Getting started with Boldo
This is the end-to-end journey for a new Boldo user. Each step has a short explanation, a hands-on Try it now mini-tutorial built around a single example (a Sales operations slice with a CRM and an ERP), and links to the deep documentation if you want more. Follow it top to bottom and you'll go from an empty workspace to a live, connected inventory with views, diagrams, charts, dashboards, and basic governance.
Plan for 30 to 45 minutes if you do every Try it now as you read. If you want the vocabulary first, the Key concepts page is a 5-minute primer you can keep open in another tab.
1. Set up your account and your team
Before everything else, you need an account, an organization, and the right people in it. Boldo separates the individual identity (your account) from the workspace (the organization), so the same email can belong to several orgs. Once your org exists, invite the people who will contribute alongside you.
Try it now
- Create your account and confirm your email.
- Log in to Boldo.
- Create or join an organization. If you create one, you become the first administrator.
- From the top-right avatar, open Organization settings → Users and invite your teammates with the right user type (Viewer, Editor, Administrator).
- (Optional) Choose a plan when you're ready to leave the free tier.
Access and first steps covers every screen of the sign-up and login flow.
2. Shape your meta model
The meta model is the schema of your knowledge base. It defines which asset types exist (Applications, Processes, Teams, AI Agents…), which properties qualify each type (criticality, owner, hosting, cost), and which relationship types are allowed between them ("Application supports Process", "Team owns Application"). Spend a few minutes here and every later step is easier.
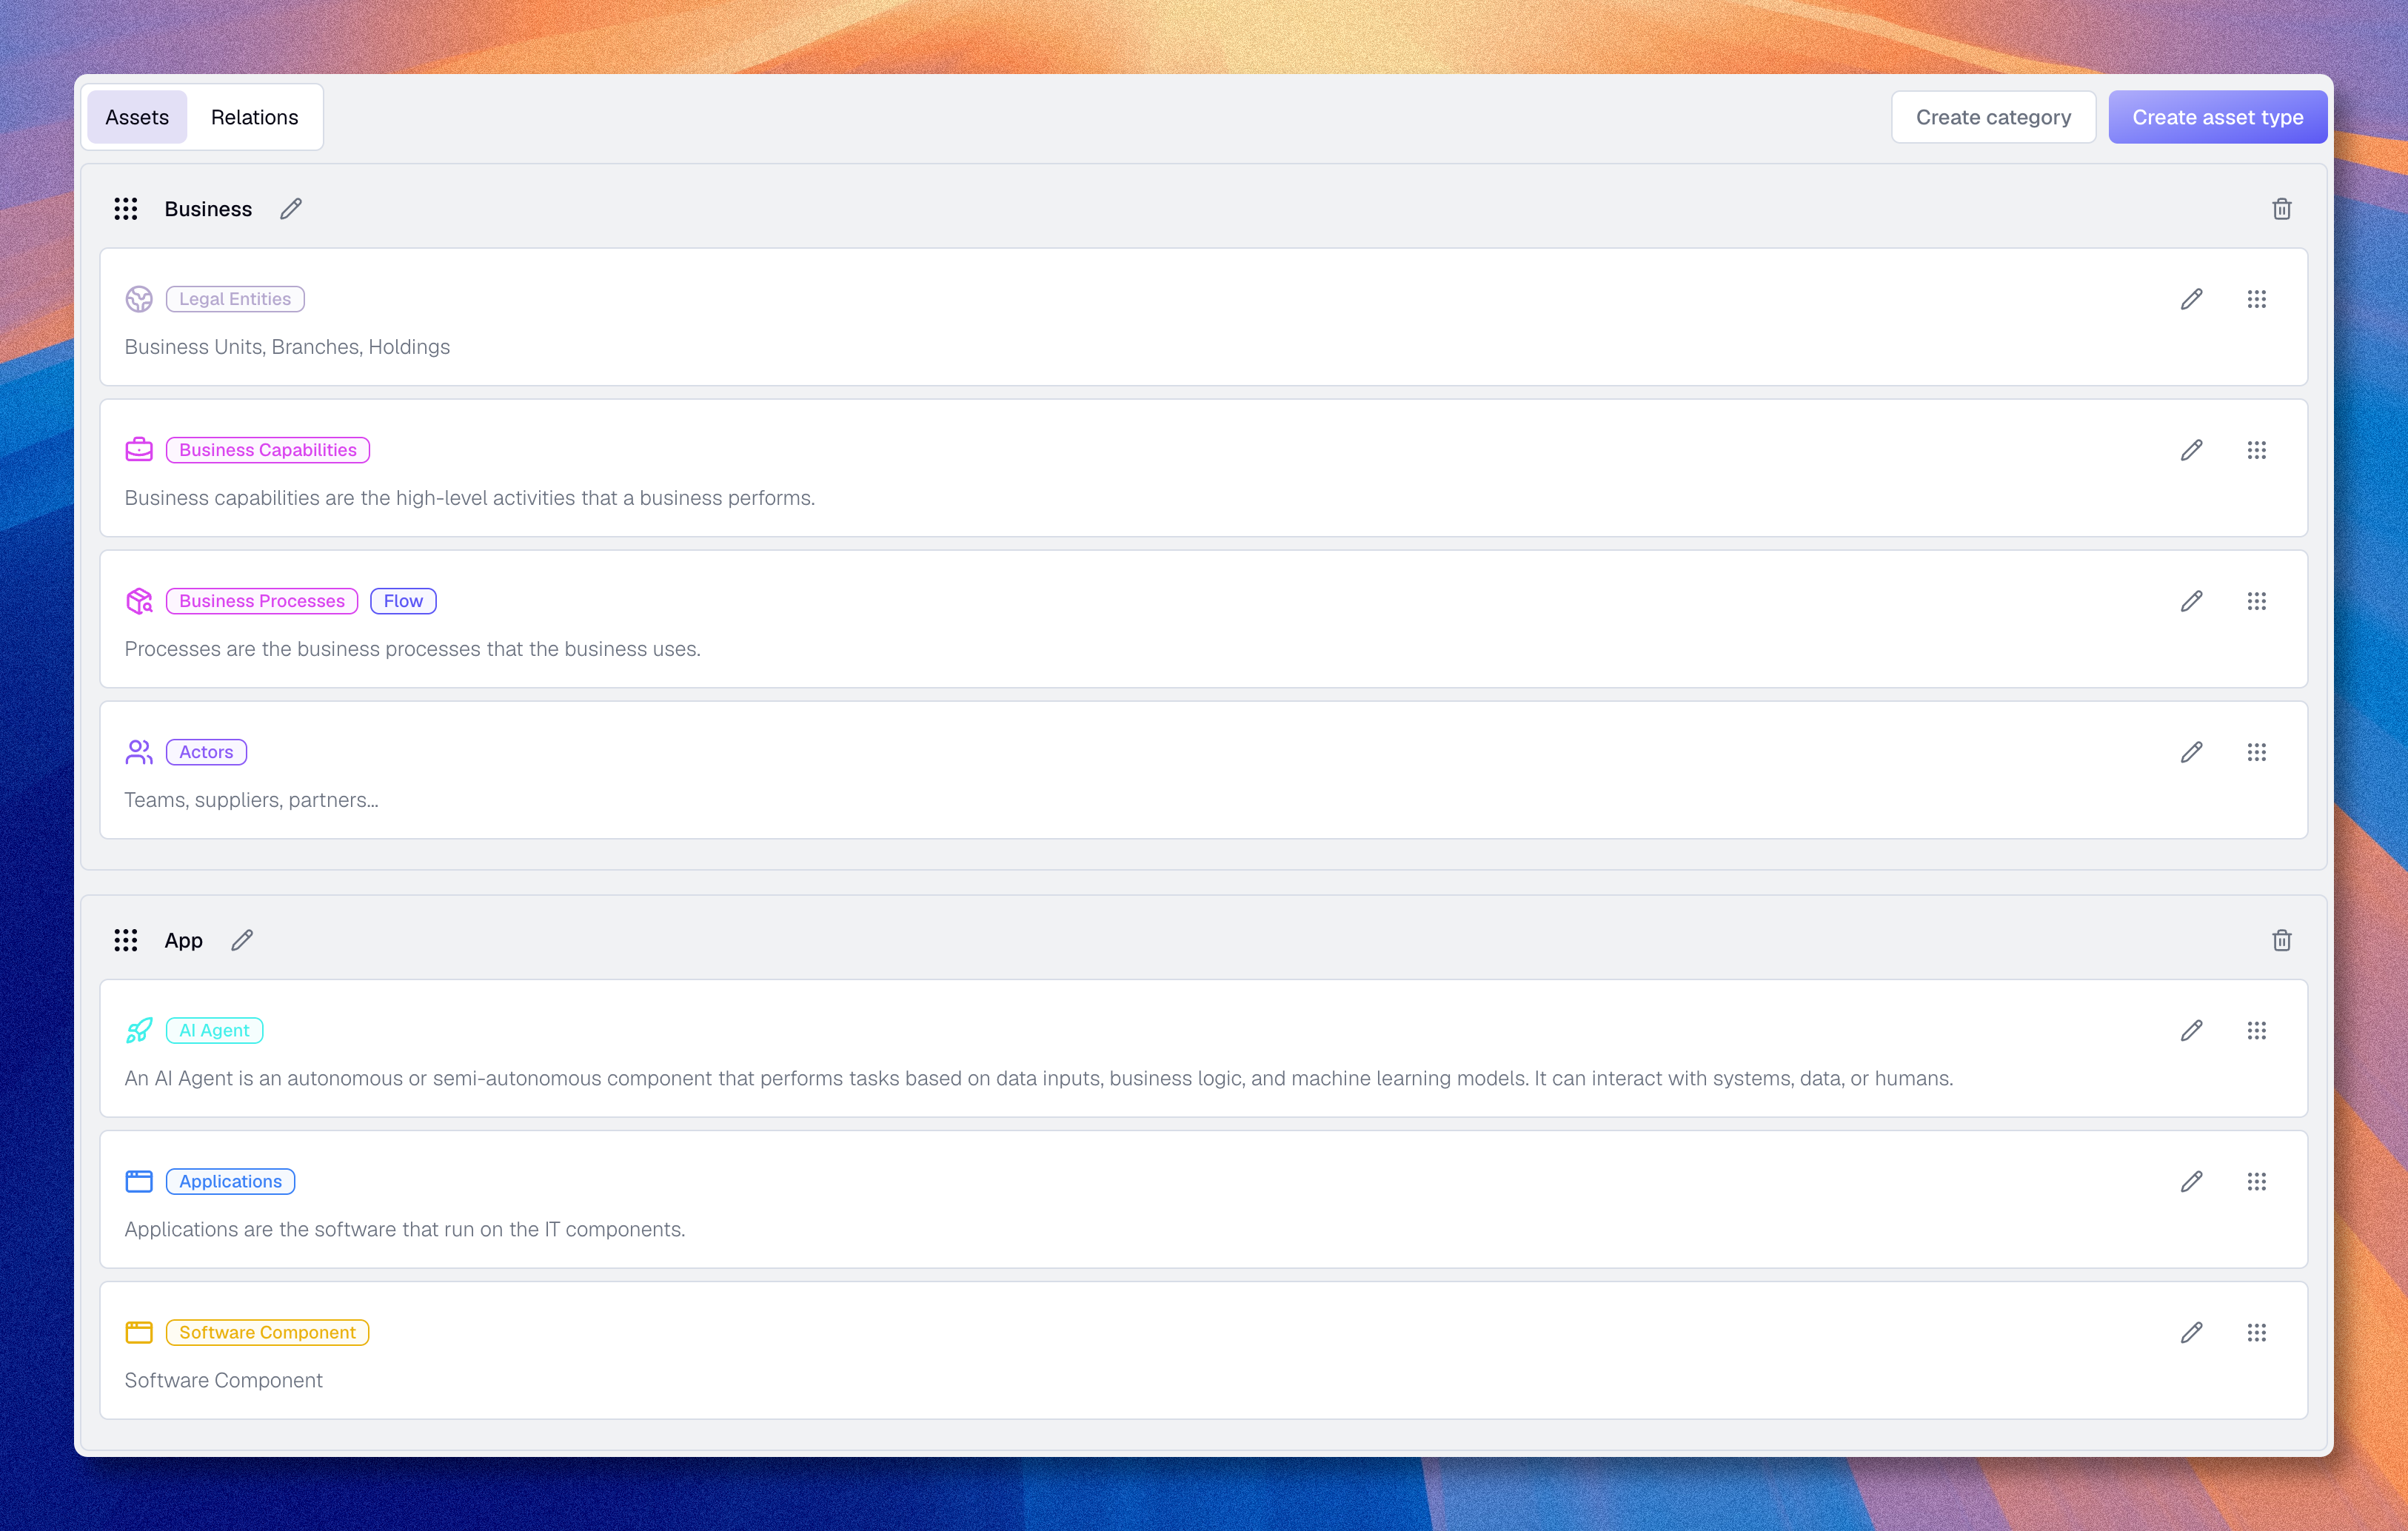
Open it from the top-right avatar, then Organization settings → Metamodel. The default model already covers the most common types: Applications, Processes, Capabilities, Teams. You can rename them, add your own types, and adjust their properties and relationships.
Try it now
- Open Organization settings → Metamodel.
- Browse the default asset types. Open Application and review its properties and relationships.
- Add one property that fits your context (for example, Vendor contact on Applications).
- Add one relationship type if you need it (for example, "Application called by Process").
- Save and close.
- Metamodel overview, the concepts and design tips.
- Asset types, Properties, Relationships, one page per building block.
3. Create your first assets
With the meta model ready, fill the inventory with a few assets to feel the loop. We'll model a small Sales operations slice: three applications (a CRM, an ERP, a Customer Portal), a Sales team that owns them, and a dataflow between the CRM and the ERP.
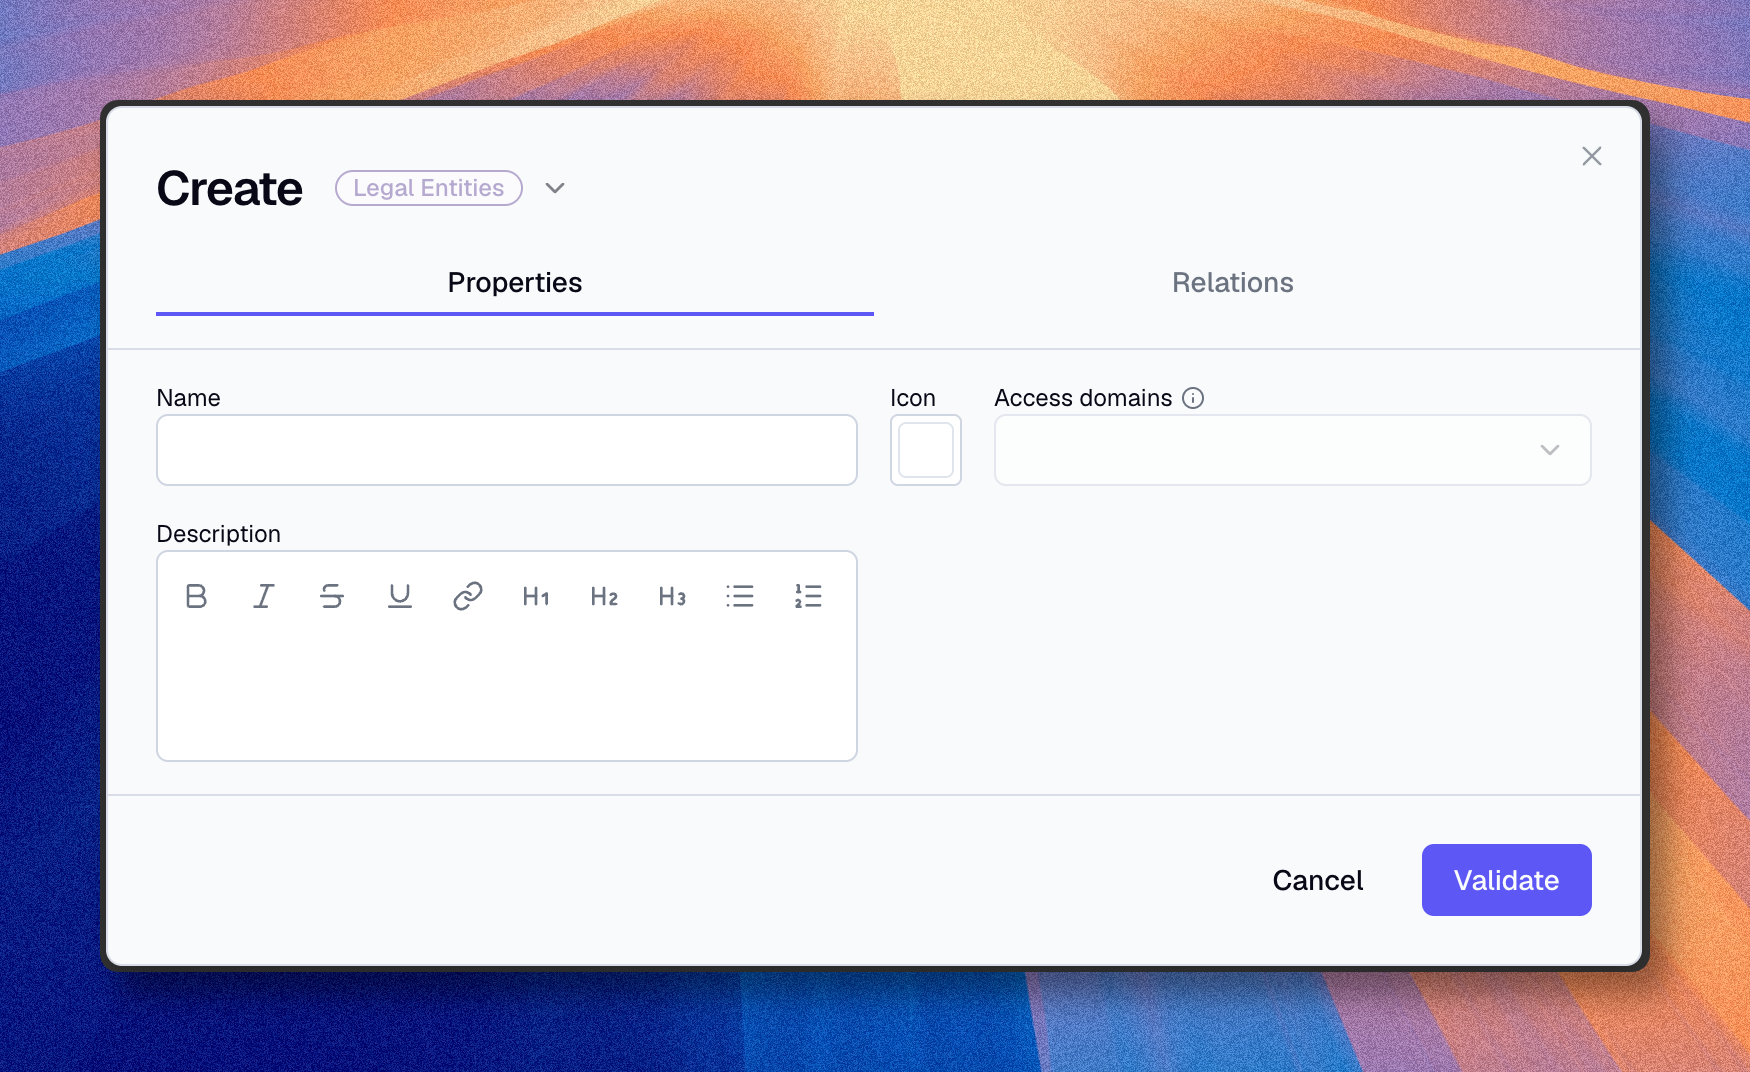
From any inventory, the Create asset button opens a modal with two tabs: Properties (the qualifying fields) and Relations (the connections to other assets). You can fill both before saving, or save with only the name and complete the rest later.
Try it now
- Go to Inventories → Applications. Click Create asset.
- Create Sales CRM with Status: In production and Criticality: High. Open the Relations tab and add a Sales Team as the owner, creating the team on the fly.
- Repeat for ERP (Status: In production, Criticality: High, owned by Sales Team).
- Repeat for Customer Portal (Status: In production, Criticality: High, owned by Sales Team).
- Open Inventories → Dataflows and create a Sales CRM → ERP dataflow linked to both Sales CRM and ERP.
You've just modeled your first connected fragment of an information system: three apps, one team, one dataflow.
Manage assets covers creation, duplication, inline editing, bulk actions, and deletion.
4. Bulk-load your inventory with CSV
Creating assets one by one is fine to feel the model. To populate a real inventory, use the CSV or XLSX import. Boldo auto-maps your columns to properties, lets you decide the matching key, and shows a dry-run preview before anything is written.
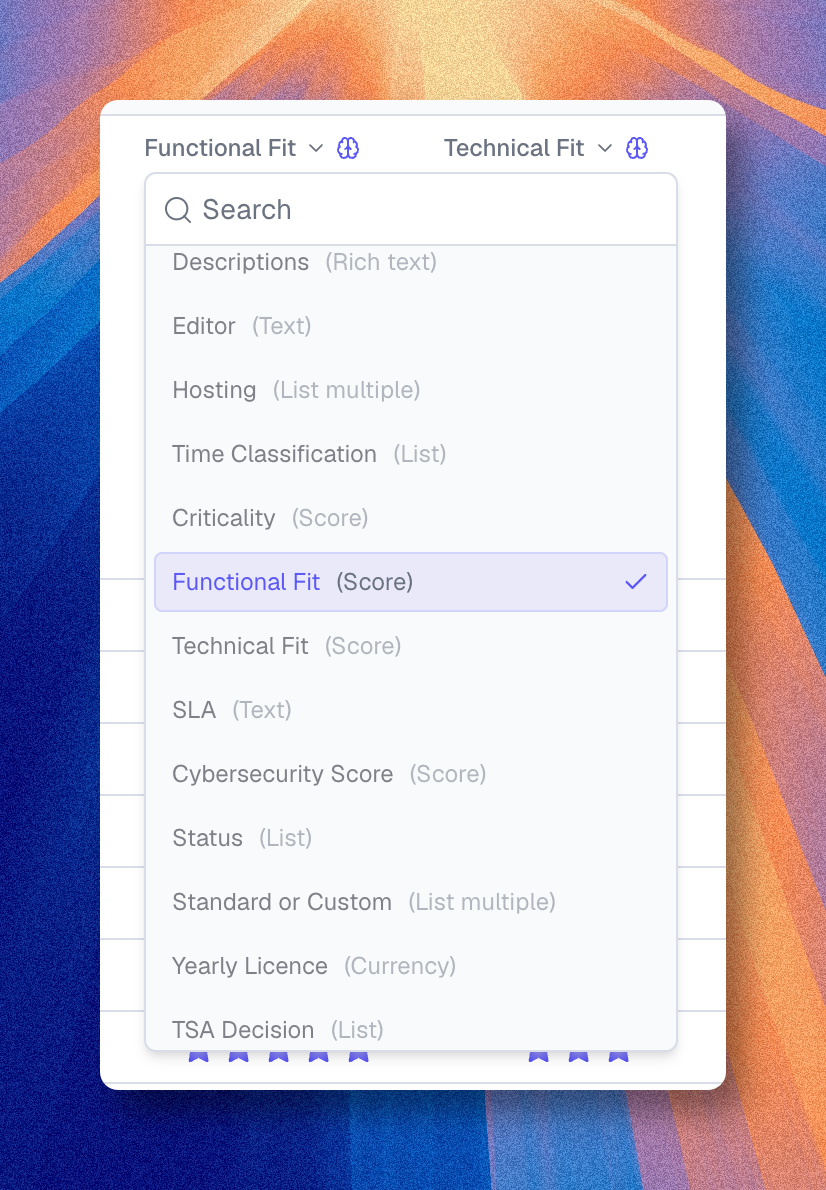
The importer matches column names to properties automatically. You set the Key type (Boldo ID, or a property like Name), handle empty values, choose how missing relations are treated, then run the Verify step. Nothing is written until you confirm.
Try it now
- Open Organization settings → Imports.
- Drop a CSV or XLSX file. If you don't have one yet, use Download a blank template to get a starter.
- Pick the asset type (for example, Application).
- Review the auto-mapped columns, set the Key type (usually Name), and click Verify.
- Check the dry-run preview, then confirm to apply.
- Hands-on companion guide: Bulk import from CSV or Excel.
- Reference docs: Prepare your import file, Import a file, Troubleshoot import.
5. Drill into an asset with Asset 360
Click any asset in the inventory to open its 360 page, the single page where you see everything about one record: properties, completion score, an interactive relationship graph, related assets grouped by type, activity history, comments, and access rights.
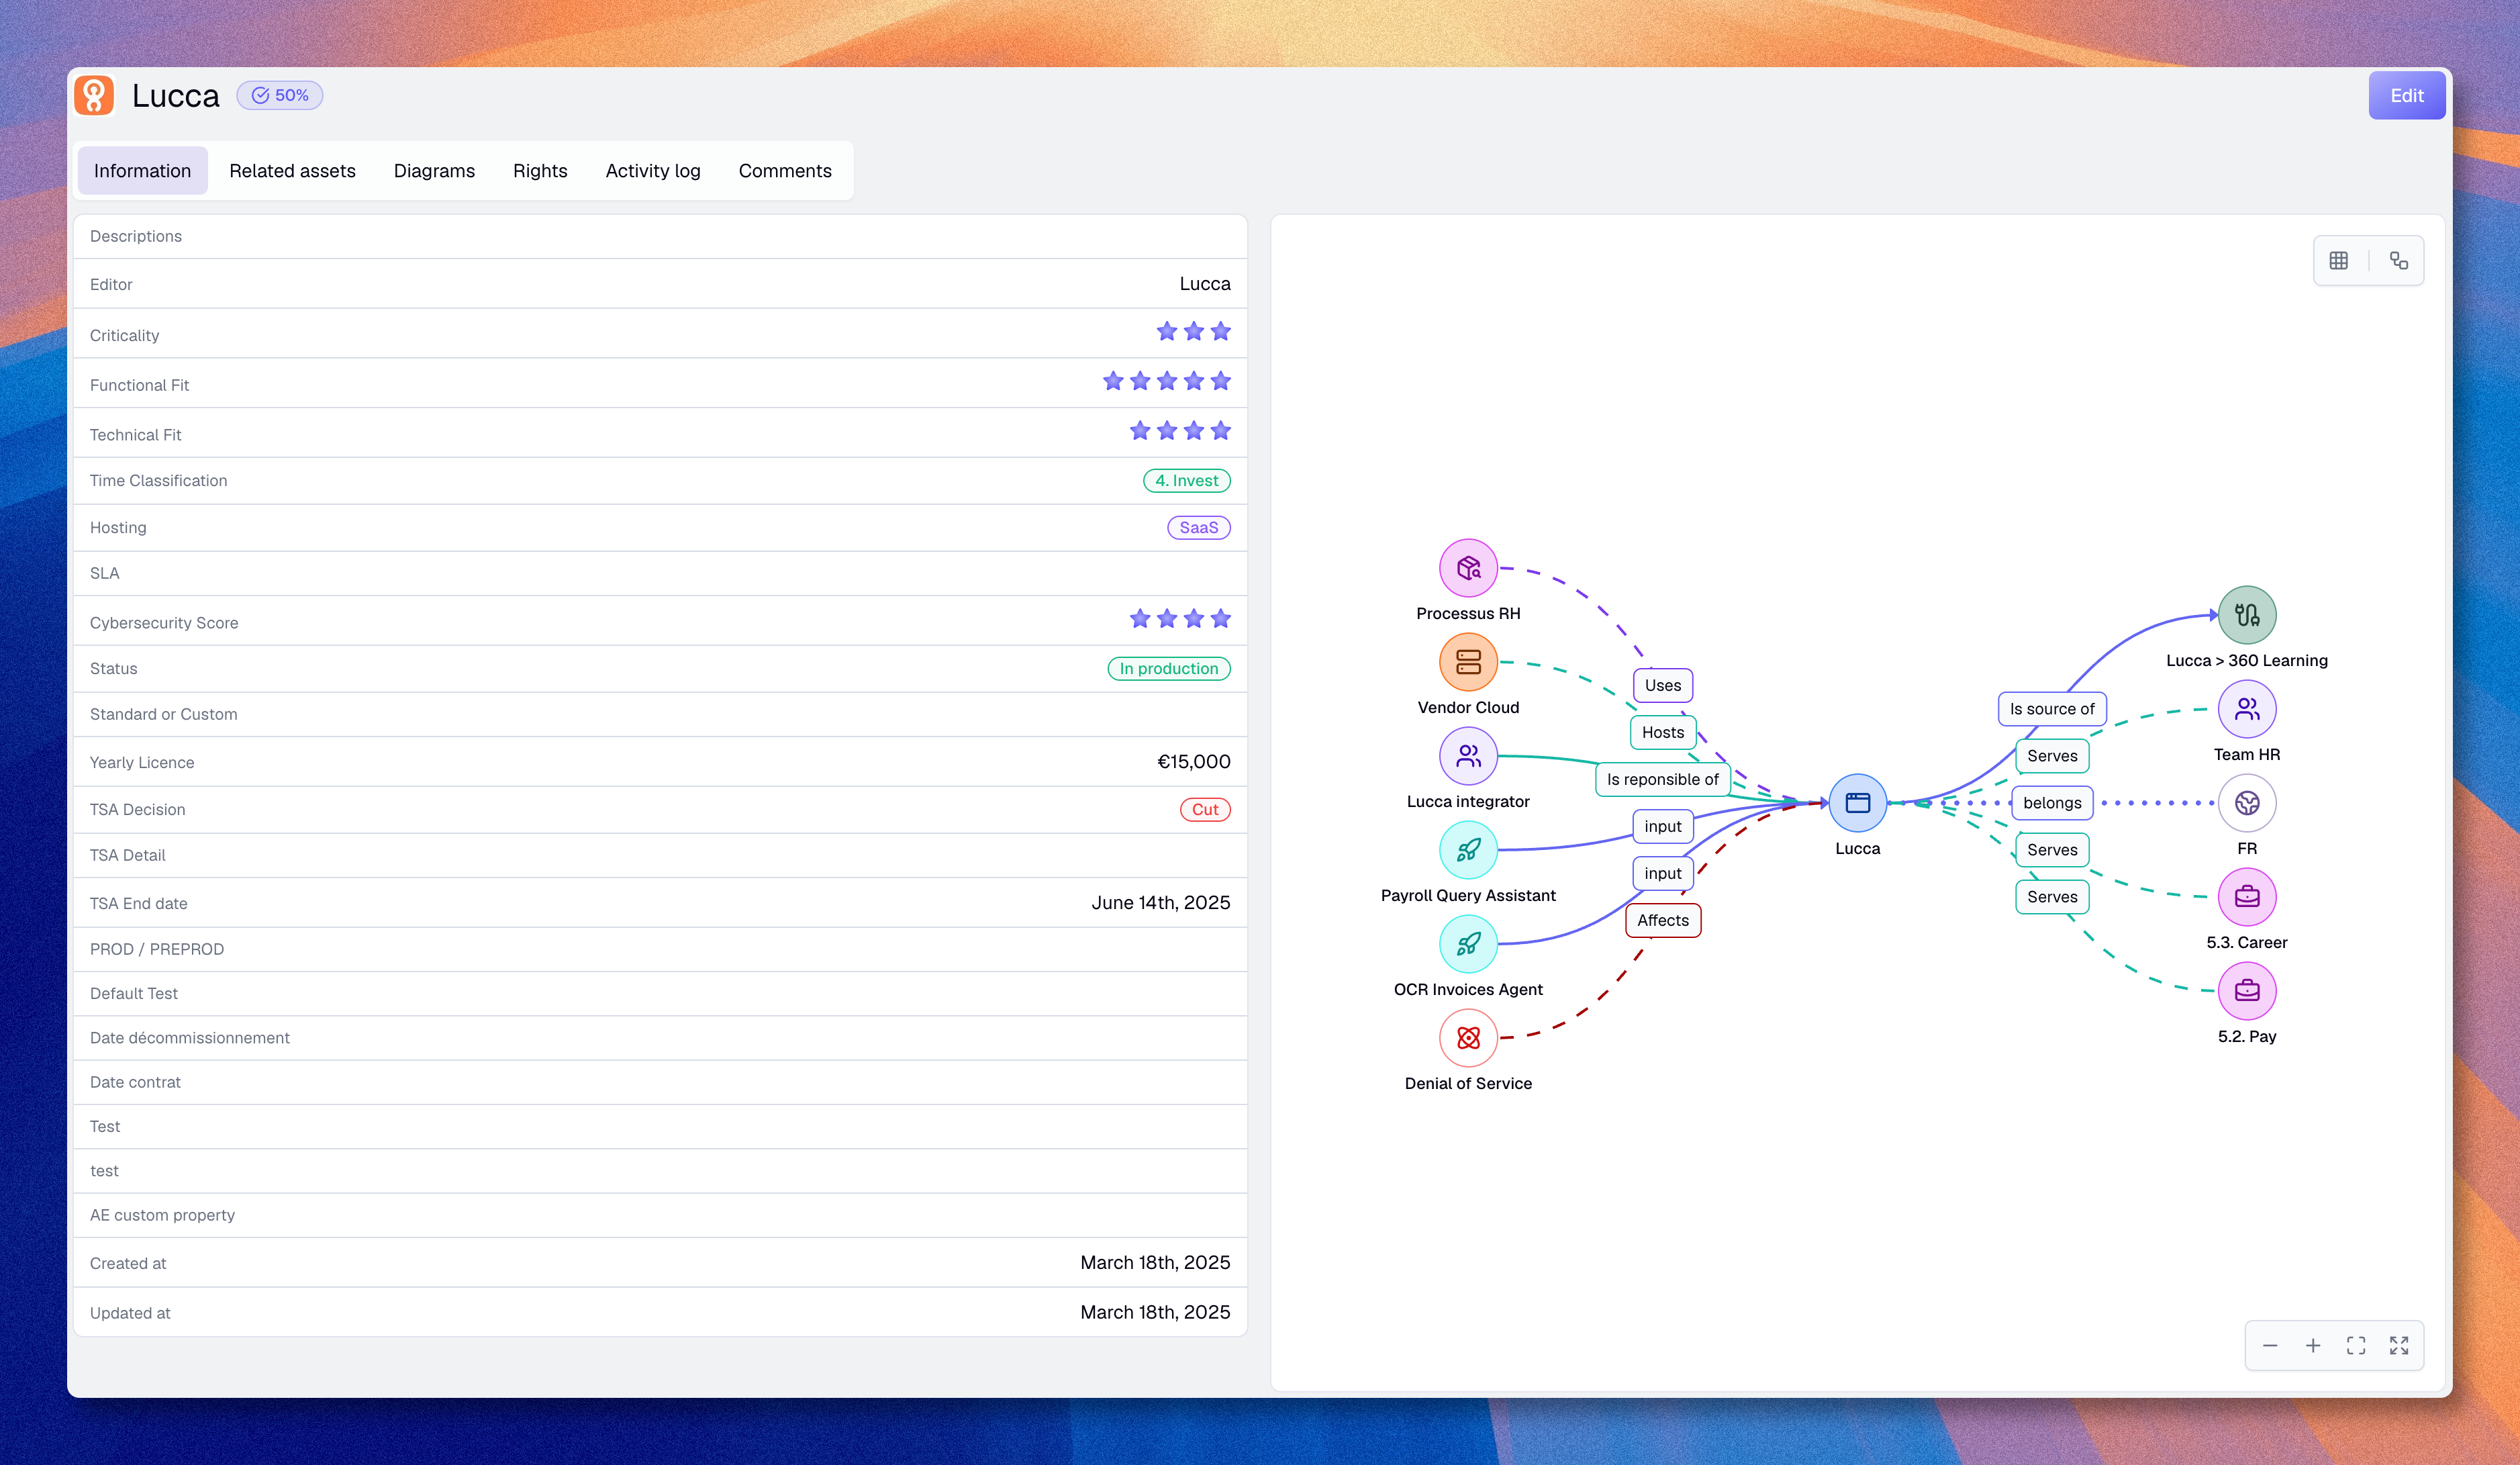
The header shows the completion score. The Information section combines the asset's properties on the left and the live relationship graph on the right. Click any node in the graph to open the inspector and explore further. Other tabs cover Related assets, Diagrams, Activity log, Rights, and Comments.
Try it now
- From Inventories → Applications, click Sales CRM.
- Read the properties on the left, then explore the graph on the right. Click the ERP node to open its inspector and inspect the dataflow that connects them.
- Open the Related assets tab to see the connected assets grouped by type.
- Open the Activity log tab to see the edit history.
- Click Edit in the header, change a property, and validate. Then add a comment under the asset to capture context for your team.
Asset 360 page details every section, the relationship graph, and the inspector panel.
6. Edit at scale: cell editing and bulk actions
When you need to update many assets at once, you don't have to open each one. Cells edit mode turns the inventory into a spreadsheet you can edit row by row, cell by cell. Multiple selection lets you update or delete several assets in one action.
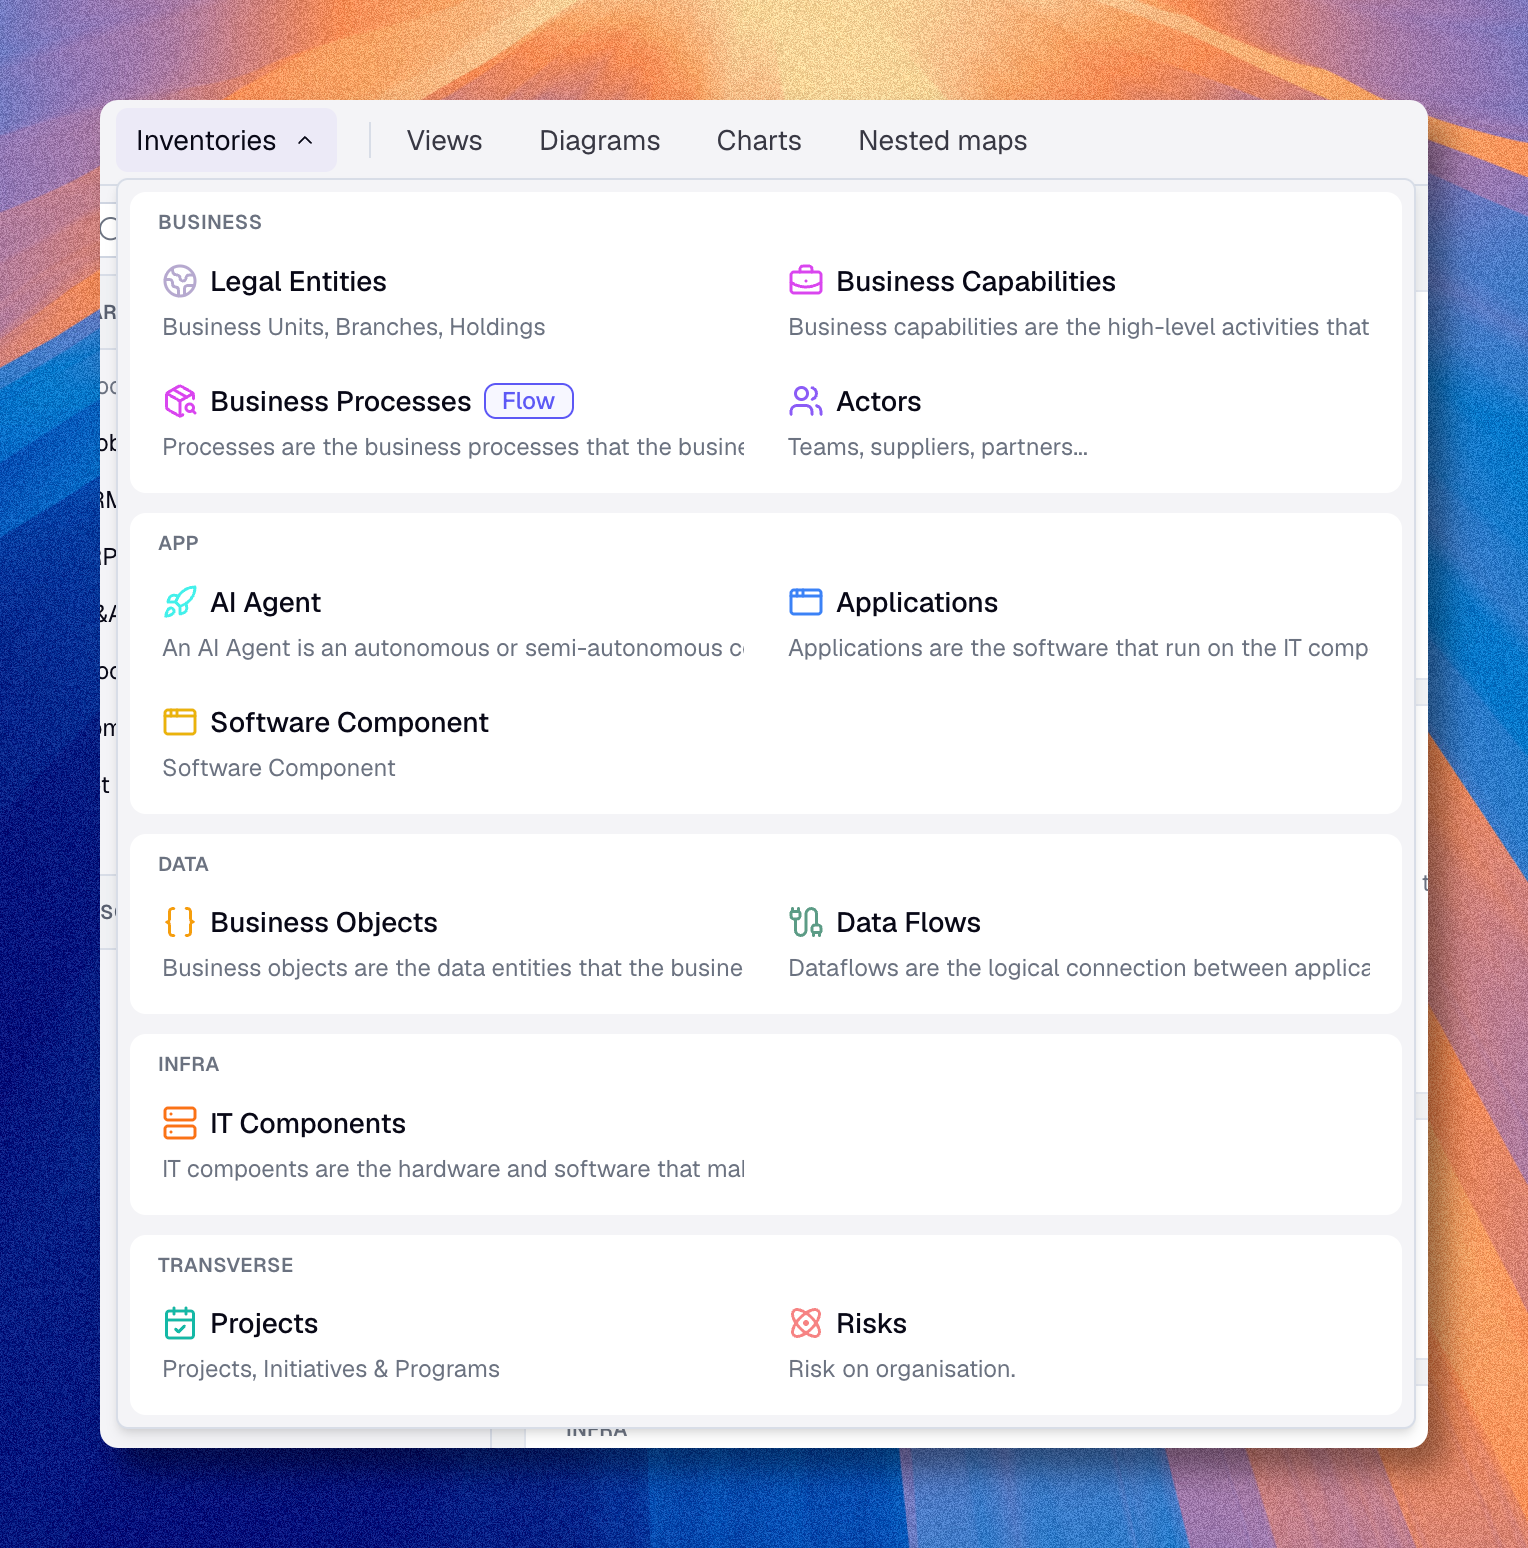
Cells edit mode keeps you in the table view, with keyboard navigation and an explicit save step. Multiple selection adds an action bar at the bottom of the screen as soon as you tick a row. Both work on the current view, so filter first to scope the change.
Try it now
- Open Inventories → Applications.
- Press Ctrl+E (or Cmd+E on Mac) to enter Cells edit mode. Edit a few cells directly in the table; navigate with Tab and the arrow keys.
- Press Ctrl+S (or Cmd+S) to save, then exit cell edit mode.
- Press Ctrl+B (or Cmd+B) to activate Multiple selection. Tick a few rows.
- In the action bar, click Update to change a property across all of them, or Delete to remove them in one go.
Manage assets covers the full edit, duplicate, bulk, and delete flows. The Inventory views page lists the shortcuts.
7. Slice your inventory with views
On top of the inventory, you build views: saved perspectives with filters, groupings, sorting, and column masks. A view doesn't change the data, only how a user sees it. Save one view per audience or per use case.
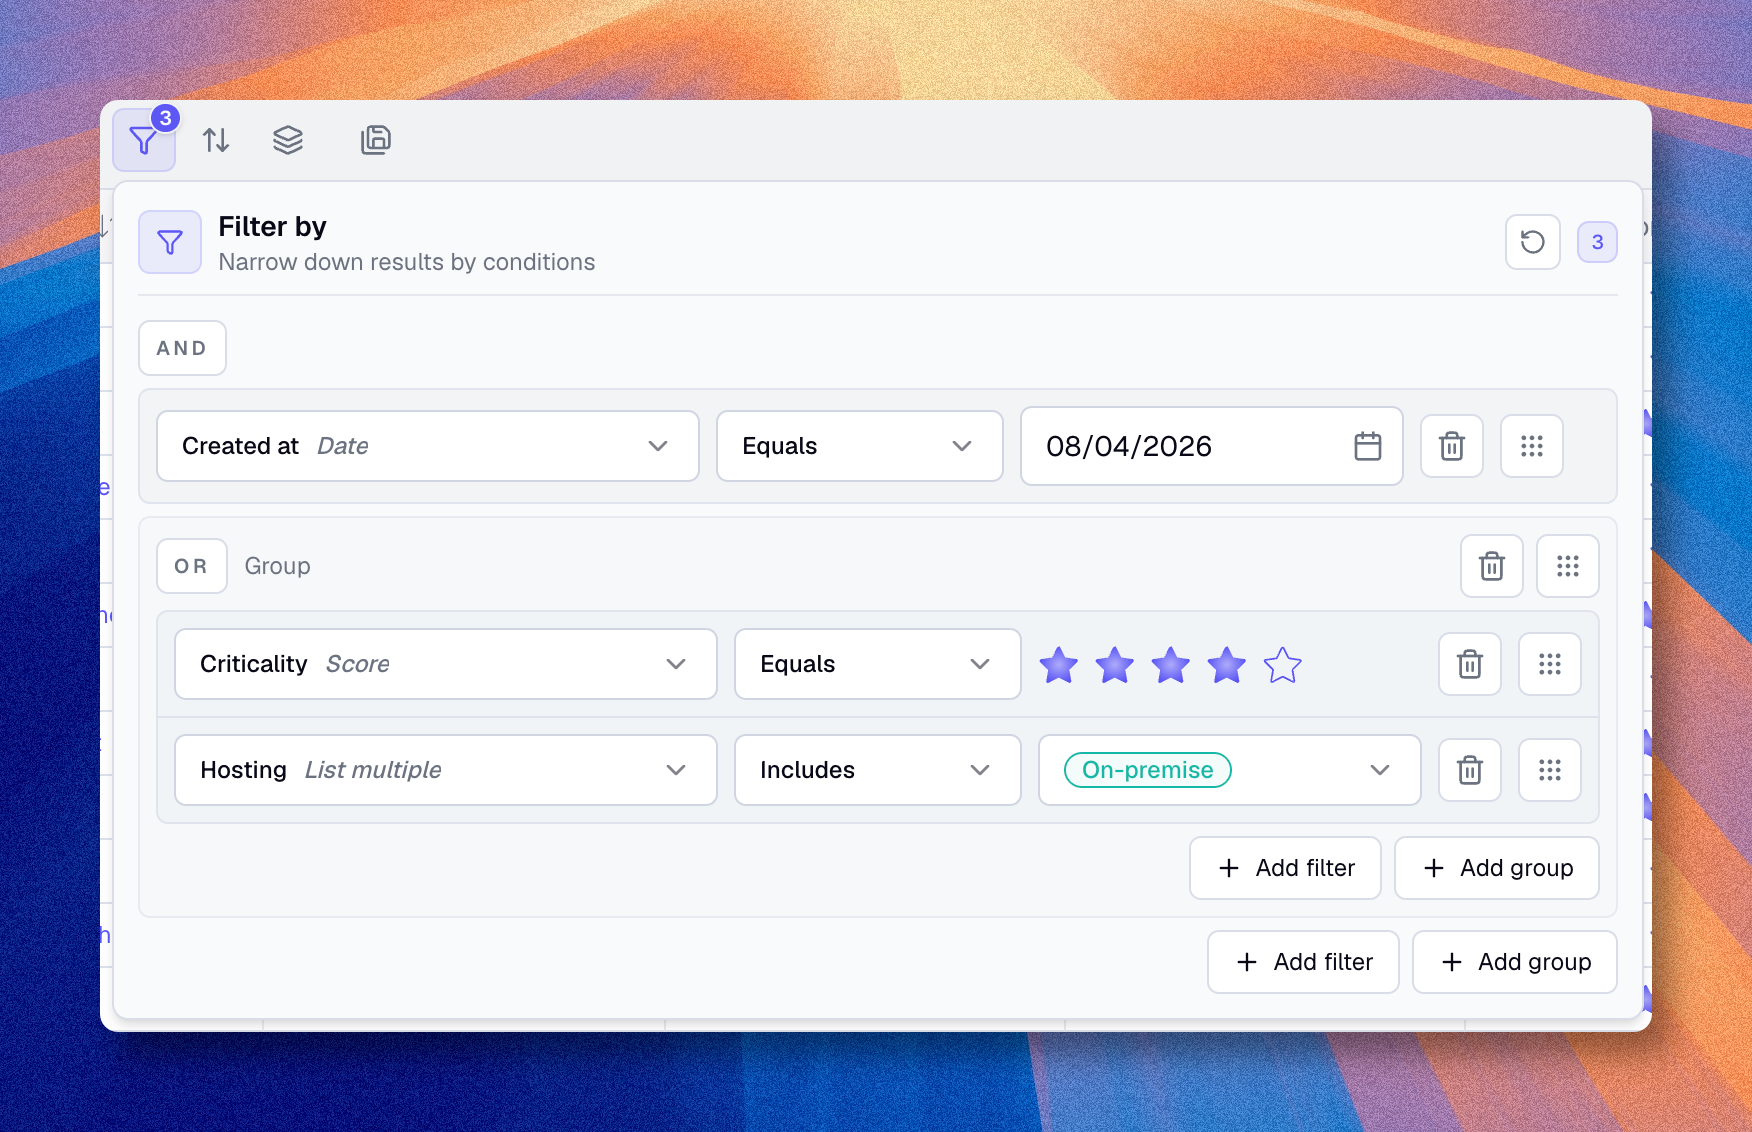
Filter by any property or relation, group by a property to break the list into sections, sort by date or score, hide the columns you don't need with Organize, then save the view with Save view as. The view stays live: as your inventory evolves, the saved view follows.
Try it now
- Go to Inventories → Applications.
- Open the Filter panel and add a rule: Criticality = High. You should see your three apps from step 3.
- Group by Status, Sort by Updated at (descending), and hide a couple of columns with Organize.
- Click Save view as, name the view Critical applications, choose where to save it, and confirm.
- In the catalog on the left, create a Folder and drop your view into it.
When you save a view, Boldo asks where it should live: in the Shared space (visible to everyone in the organization) or your Personal space (only you). The inventory itself is always shared. Only visualizations like views, diagrams, charts and nested maps have these two spaces. Use Personal for drafts; move to Shared when the view is useful for the team.
- Inventory views, Filters, Choose the right visualization.
- Visualizations and spaces explains the Personal and Shared spaces in depth.
- Use folders in the catalog and Manage favorites.
8. Tell a story with diagrams
A diagram turns a view into a visual map. The canvas behaves like Miro or Draw.io, but every node is a real asset from your inventory. Connections can stay as free visual arrows for storytelling, or you can promote them to real relationships in the meta model.
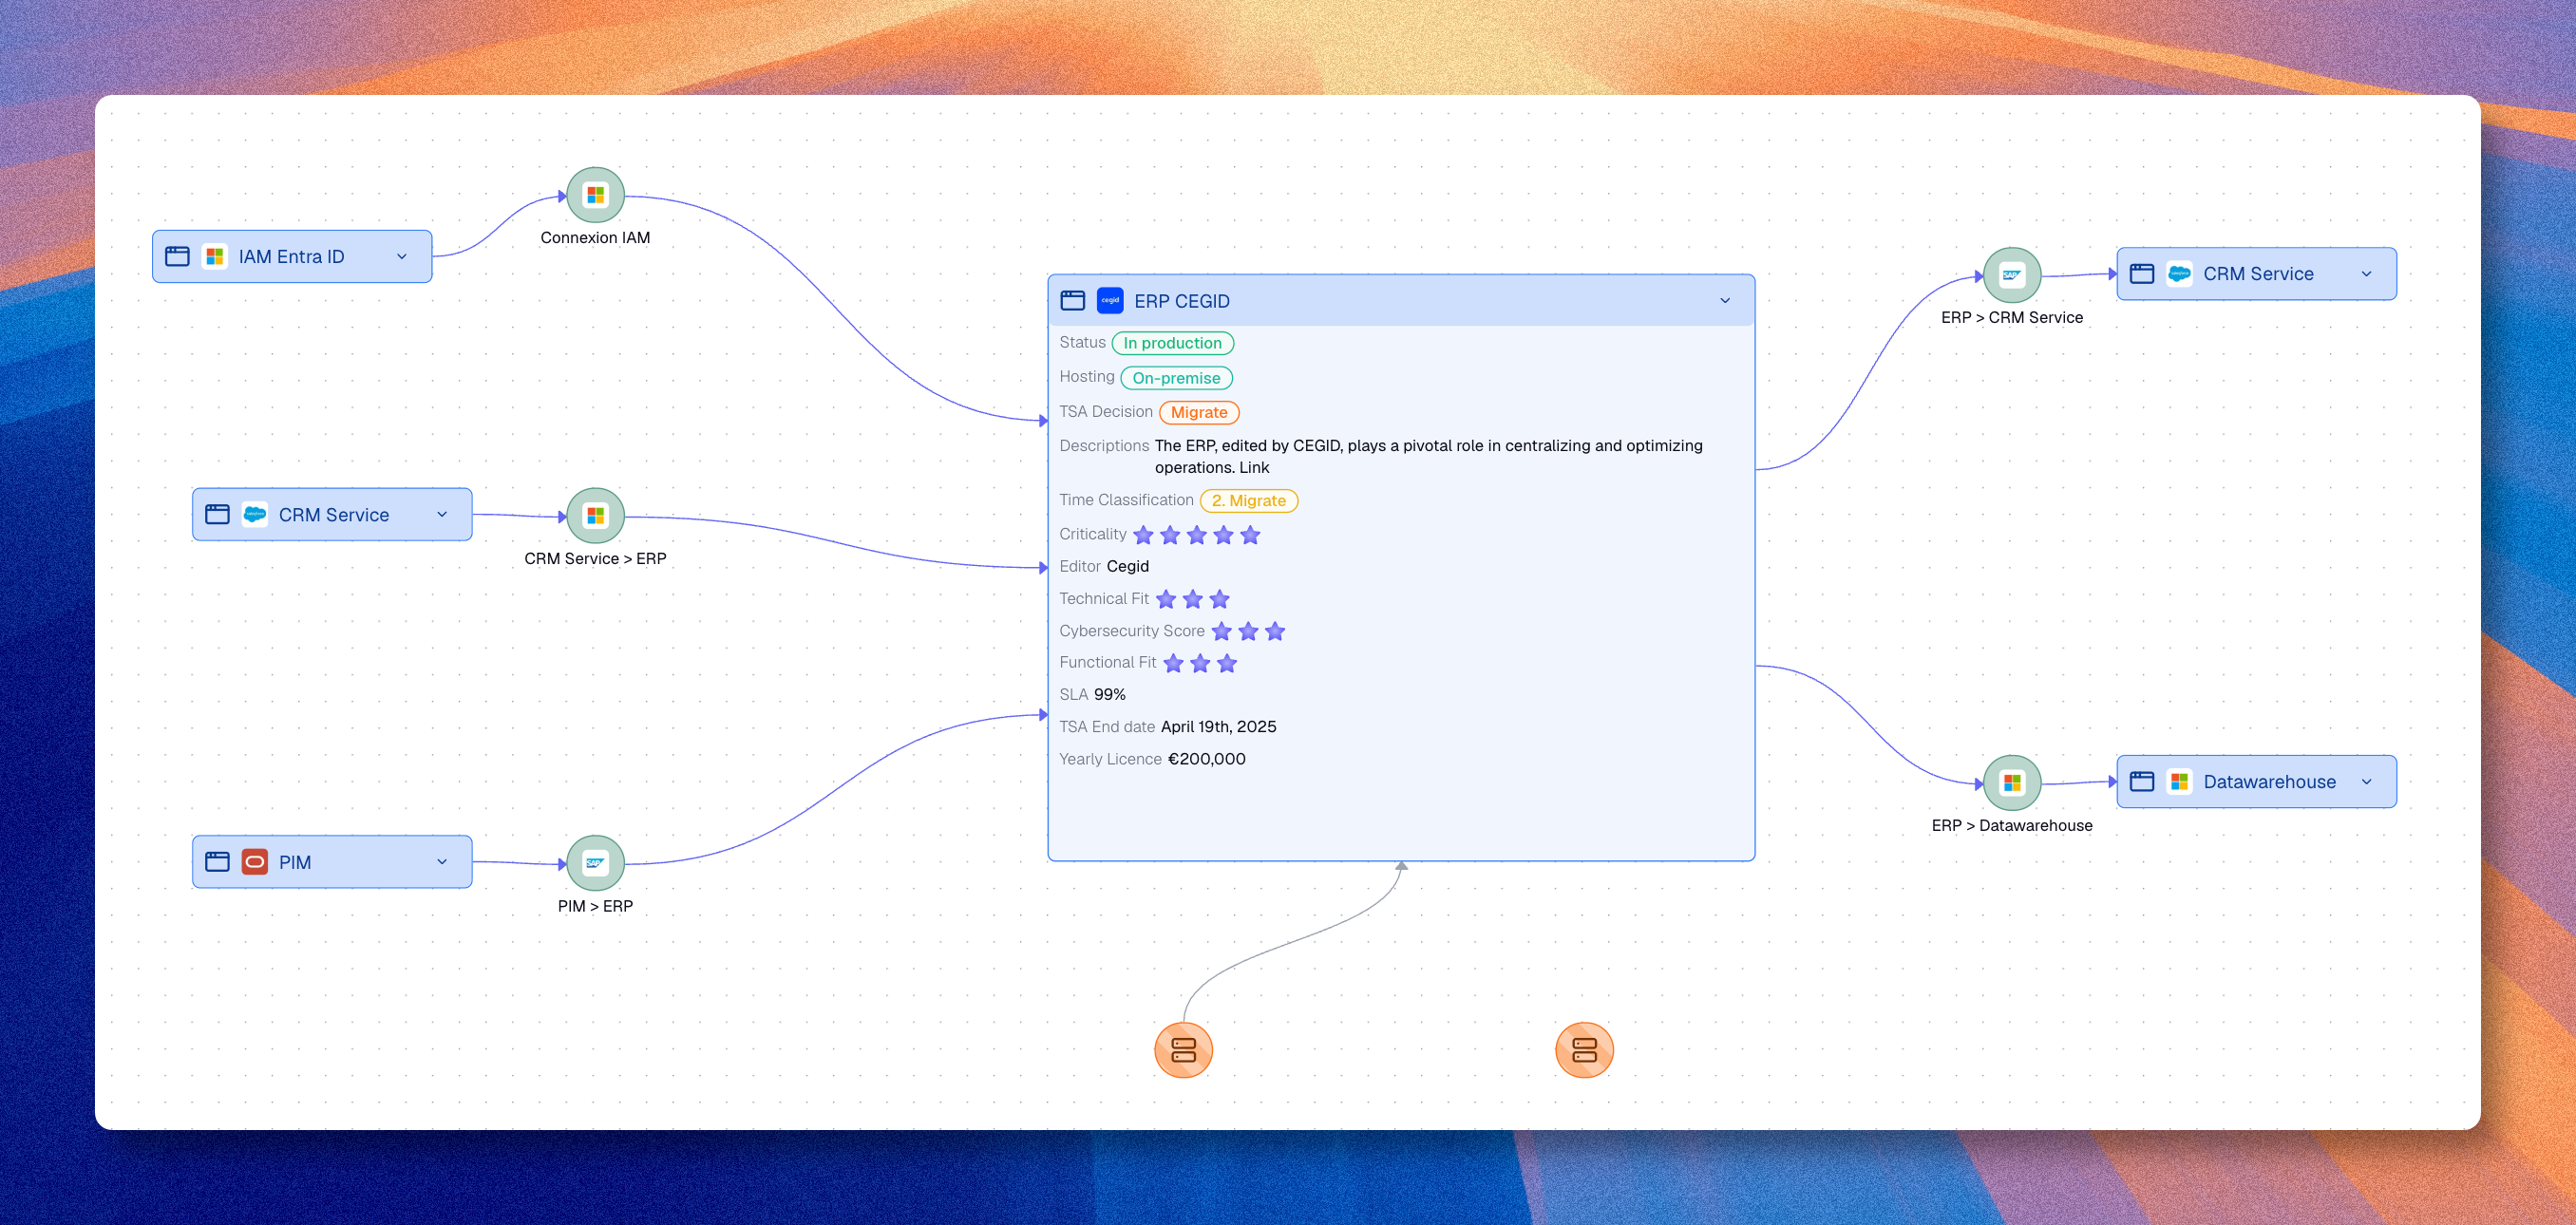
From any view, click Convert view to diagram to generate the canvas in one step. From there, drag in more assets, draw connections, add shapes, text, lanes and groups, and use cameras to save viewpoints. Multiple people can edit the same diagram in real time, which makes it a good workshop tool.
Try it now
- Open the Critical applications view from step 7.
- Click Convert view to diagram, name it Critical apps map, and confirm.
- From the canvas, drag in the Sales Team asset and connect it to your three apps.
- On one connection, type a free name to keep it as a visual arrow. On another, pick a real relationship type from the menu to promote it into the meta model.
- Save and re-open the diagram from the Diagrams catalog.
- Diagrams, full editor reference.
- Visualizations and spaces covers when to use a view, a diagram, a chart, or a nested map.
9. Answer questions about quantities with charts
Charts read your inventory to compute indicators, distributions and KPIs. Pick an asset type, choose a Group by property, pick an Aggregation (count, sum, average, distinct values), and you get a pie, bar, line, area, radar, gauge, or single KPI. Click any data point to drill down to the underlying assets.
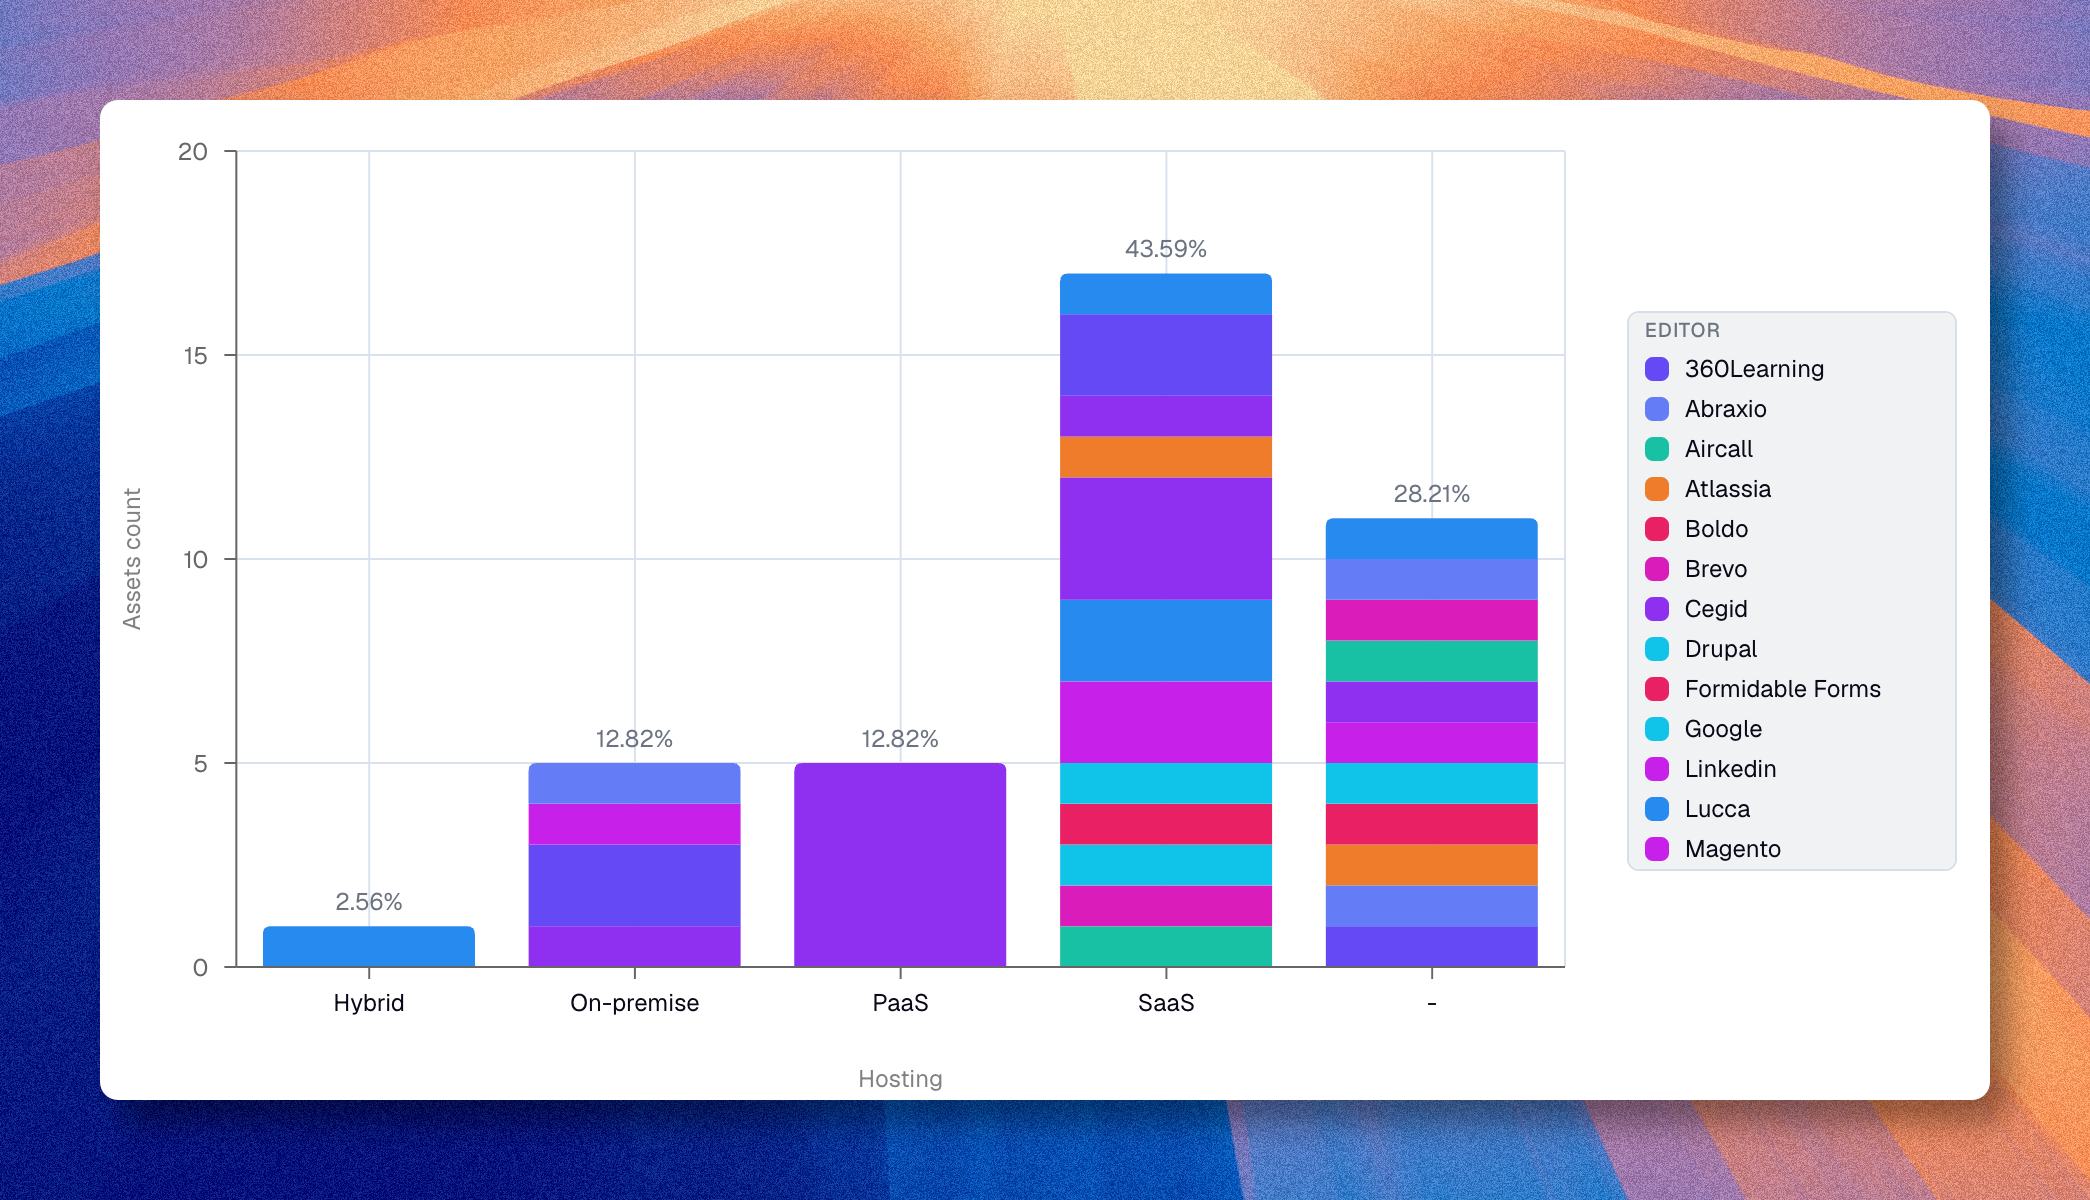
Charts read from the same live inventory as views and diagrams. A bar chart of applications by hosting refreshes automatically as you add new applications. Switch chart type without losing the configuration. Save the chart, reuse it in dashboards, export it as an image for a slide deck.
Try it now
- Click Charts in the top navigation, then Create a new chart.
- Pick Application as the asset type.
- Set Group by → Hosting and switch to Bar chart.
- Click any bar to drill down to the underlying applications.
- Save the chart with a meaningful name and place it in a folder.
- Hands-on companion guide: Build your first chart.
- Reference doc: Charts covers every chart type and configuration option.
10. Map hierarchies with nested maps
Nested maps compute hierarchies directly from your relationships. Pick a root (for example a Business Capability), declare how to traverse (Capability → Application → AI Agent), and the map draws itself from your data.
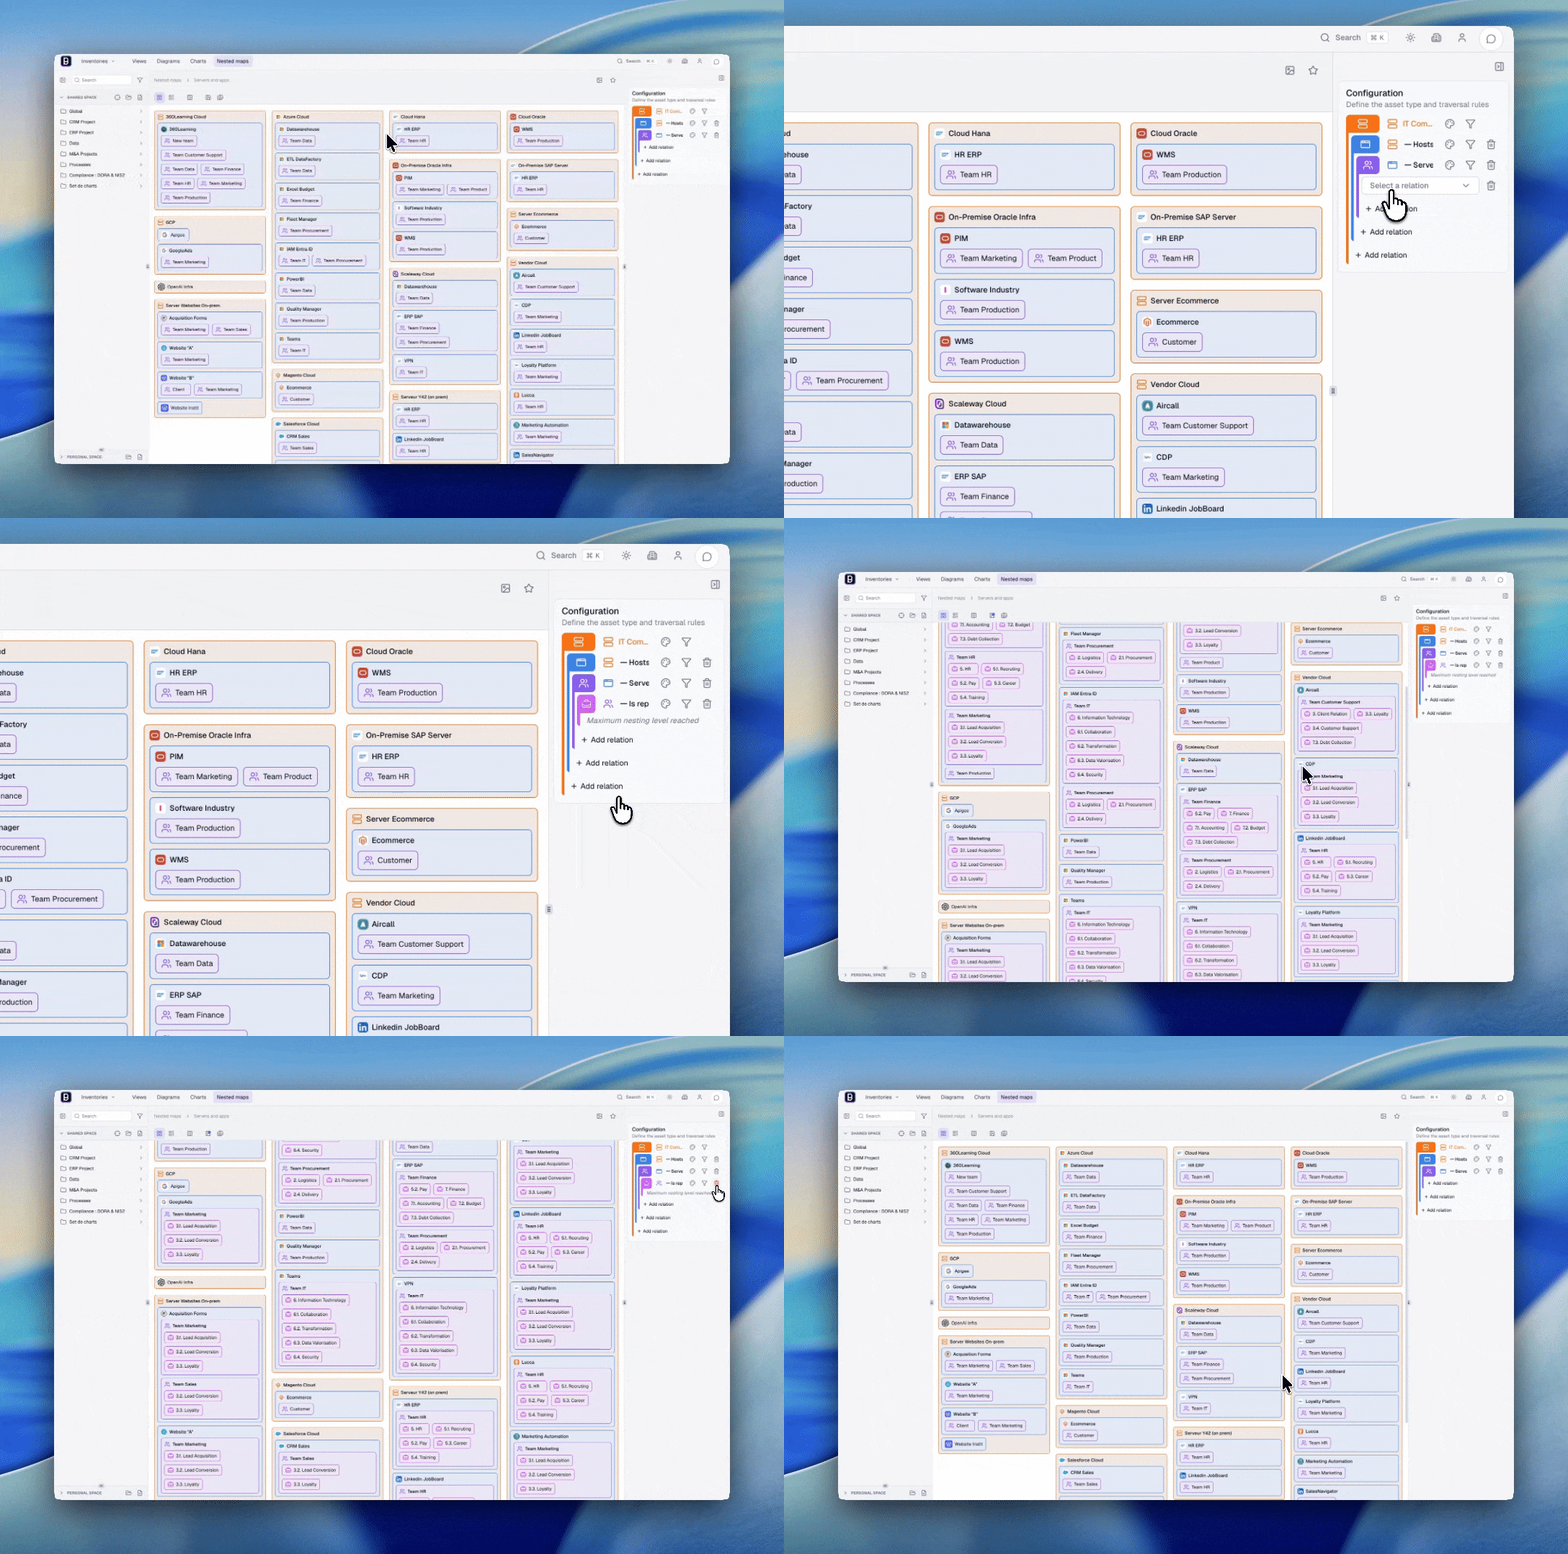
Filter at each level, highlight by property (status, maturity), and switch between nested blocks and a compact list. Click any block to open the asset preview. Useful for capability mapping, scope analysis, and dependency overviews.
Try it now
- Open Nested maps in the top navigation.
- Click + in the catalog, then New nested map. Name it and confirm.
- Choose Business Capability as the root.
- Add a traversal: Capability → enabled by → Application.
- Apply a filter (for example Status = Active), set a highlight property (Criticality), and click a block to open the asset preview.
Nested maps: root, traversal, parallel branches, highlighting.
11. Compose a dashboard
A dashboard gathers several visualizations on a single grid. Drop charts, views, diagrams, nested maps, single assets, and rich text onto resizable widgets. Build one dashboard per audience: a CIO portfolio overview, a domain review, a project status. Every widget reads from the live inventory, so the content updates as the data does.
Try it now
- Go to Dashboards and click Create dashboard.
- Switch to Edit mode with the lock icon in the toolbar.
- Add four widgets: the chart from step 9, the view from step 7, the diagram from step 8, and a text widget for the title and context.
- Resize and reorganize the widgets on the grid.
- Save and switch back to Read mode for the audience view.
Dashboards: widget types, sizing, lock mode, save-as.
12. Model a process
Some asset types, typically Processes, support a Flow editor. From the Asset 360 of a process, you draw the steps (tasks, choices, ends), reference the inventory assets involved inside each step, and walk stakeholders through the result. It's the bridge between business processes and IT assets.
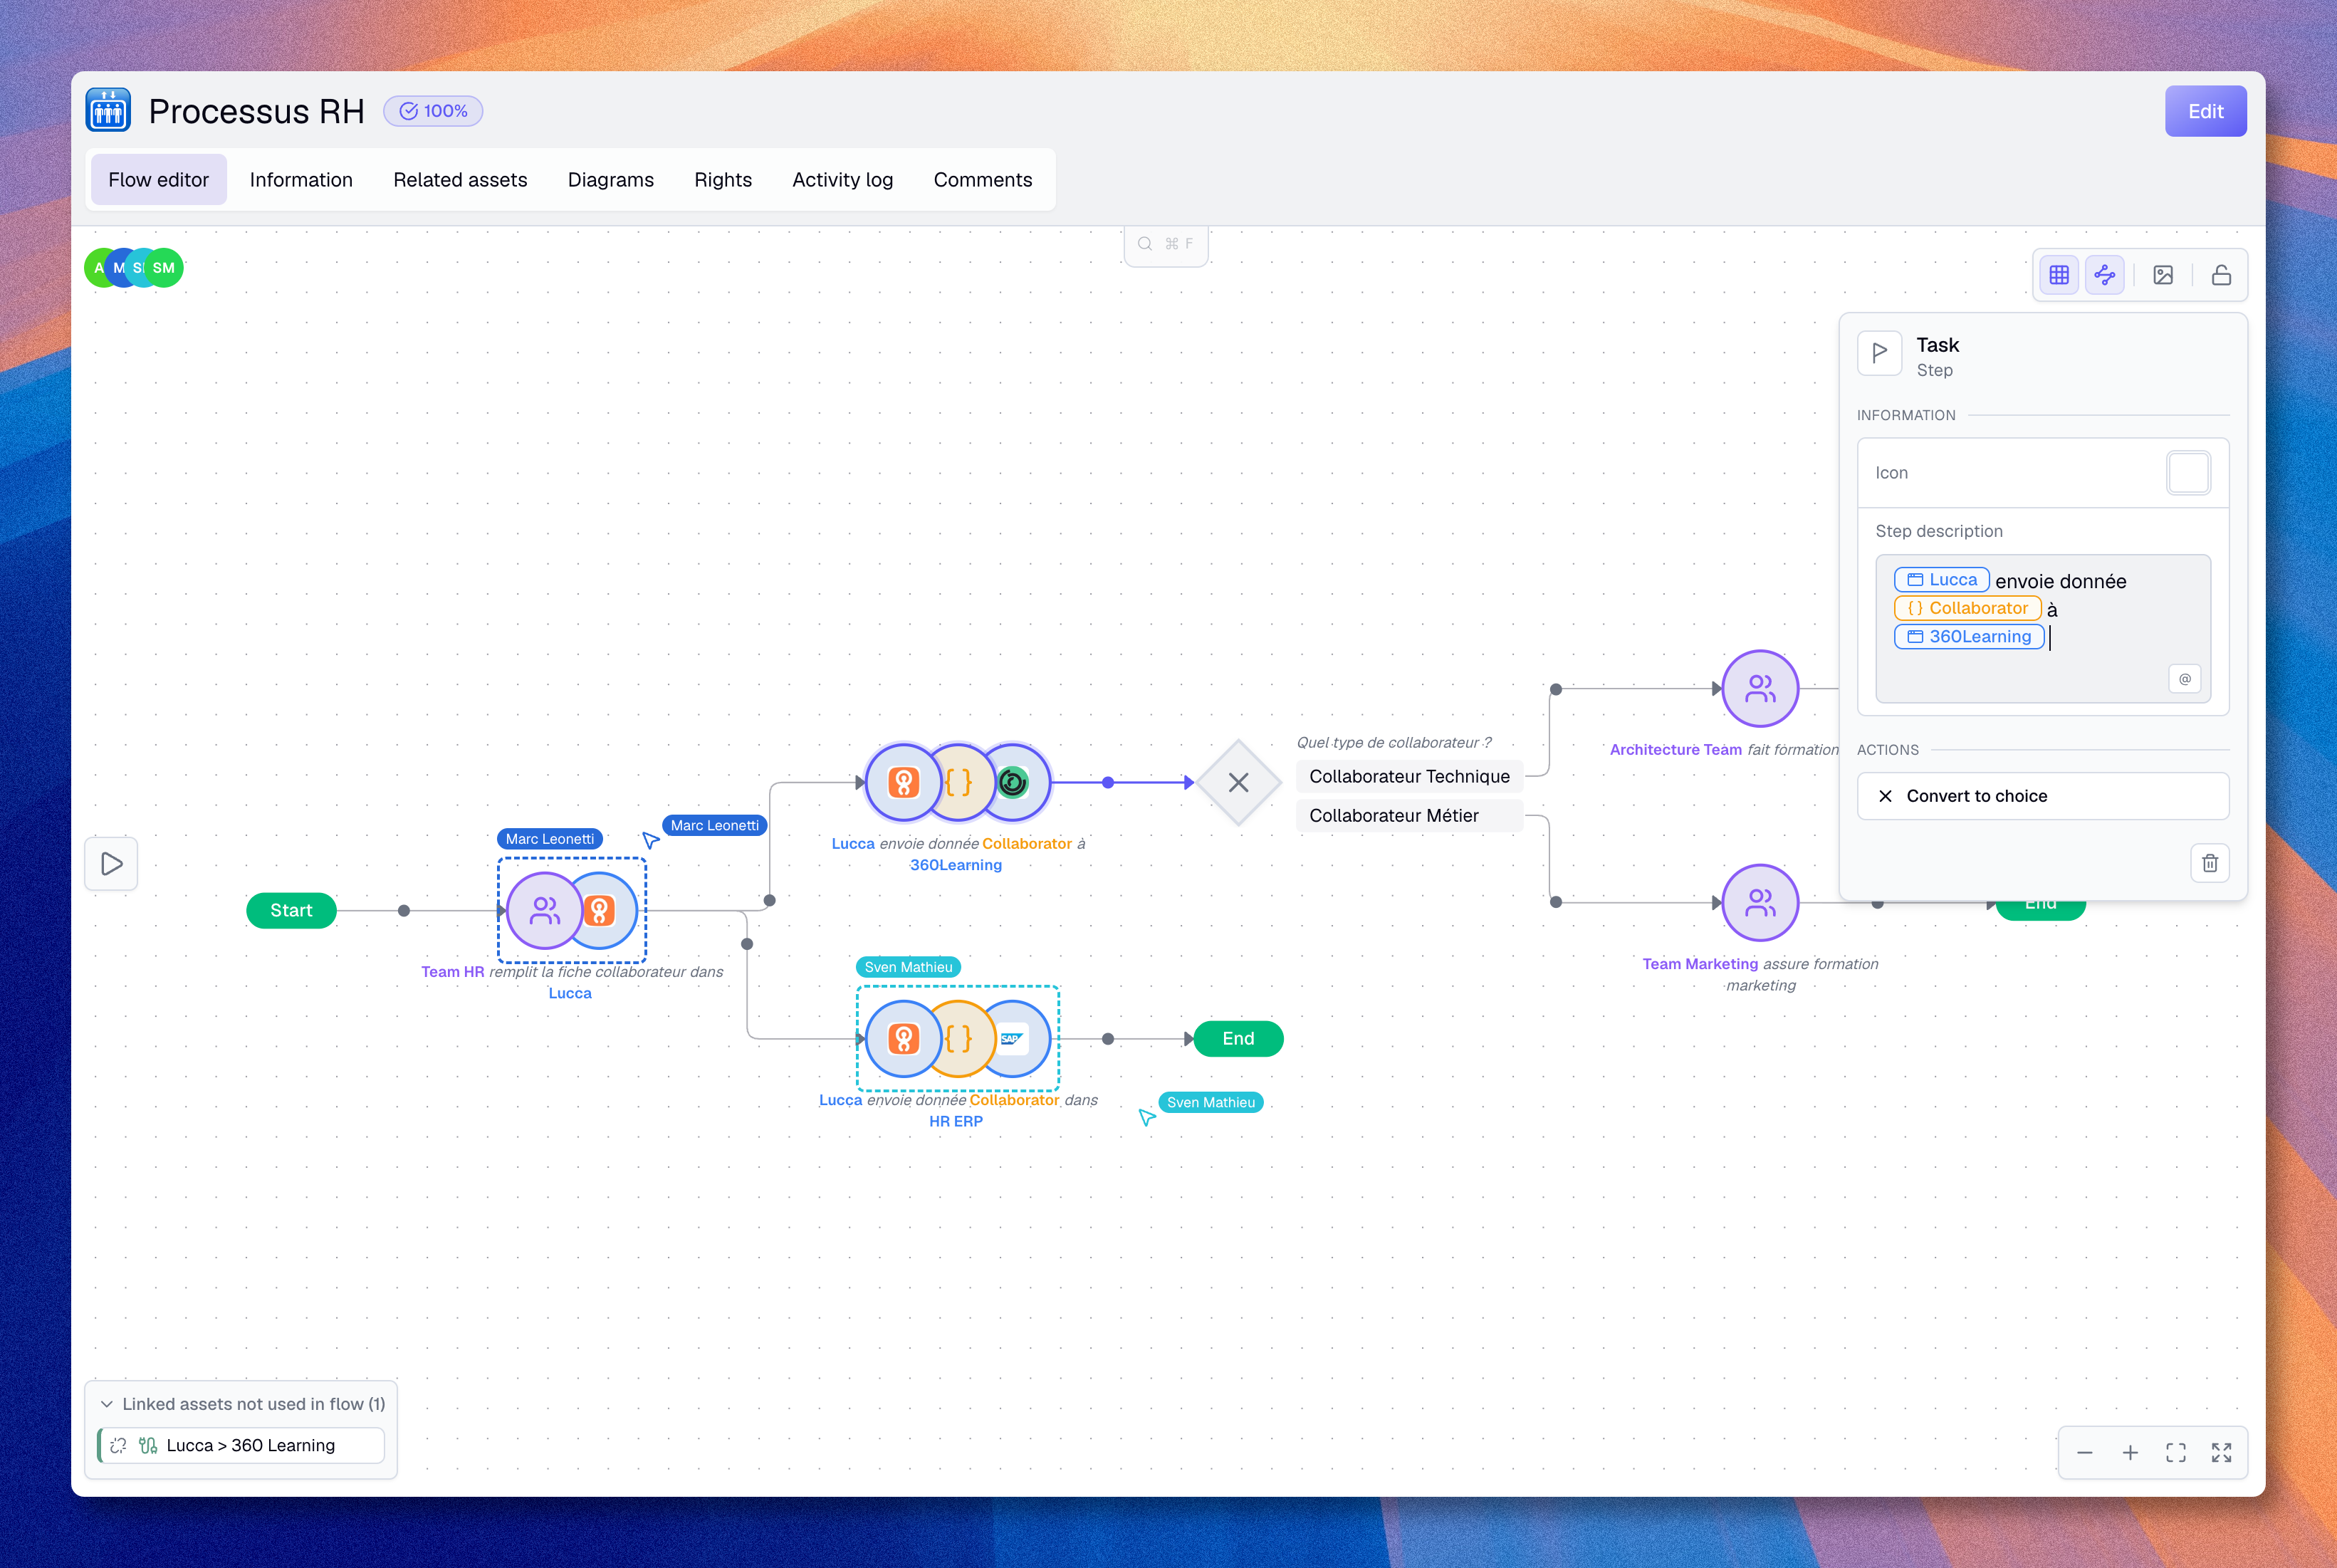
Open the Flow editor tab on the Process 360, drag in Task, Choice and End steps, and draw the connections. Inside any step's description, start typing an asset name and pick it from the autocomplete menu to reference an inventory asset. Switch to Exploration mode to walk stakeholders through the flow live, branch by branch.
Try it now
- Go to Inventories → Processes and create a process named Customer onboarding if you don't have one yet.
- Open its Asset 360 page, then the Flow editor tab. If you don't see the tab, ask an administrator to check the Flow option on the Process asset type and your flow access rights.
- Add a Task step Create customer in CRM. In its description, start typing Sales CRM and pick it from the autocomplete to reference it.
- Add another Task step Push to ERP, reference ERP inside it, and connect the two tasks.
- Switch to Exploration mode from the canvas toolbar and walk the flow end to end.
Process flows: step types, asset references, exploration mode, rights.
13. Find anything fast with global search
Once your inventory grows, navigation matters. Press Ctrl+K (or Cmd+K on Mac) anywhere to jump to any asset, view, diagram, chart, nested map, or settings page. Prefixes scope the search; quick actions let you create new items without leaving the keyboard.
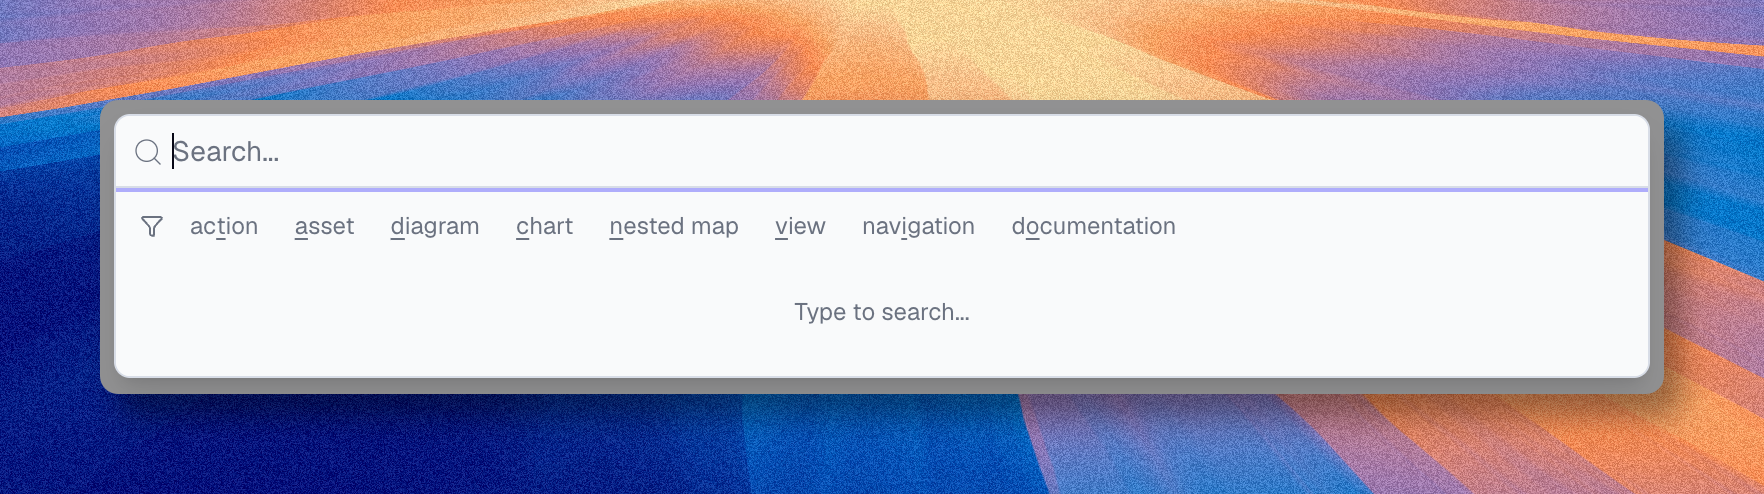
Type a name to find any object. Use a prefix to scope: /a for assets, /d for diagrams, /c for charts, /v for views, /n for nested maps. Quick actions like Create application or Create team appear in the same palette.
Try it now
- Press Ctrl+K (or Cmd+K).
- Type CRM and press Enter to jump to Sales CRM.
- Open the palette again and try a prefix: /d then a name to find a diagram, /c for a chart, /v for a view.
- Trigger a quick action: type Create application or Create team to invoke it from the palette.
Global search: prefixes, quick actions, navigation shortcuts.
14. Set up governance for your team
When several people share the workspace, governance comes into play. Boldo combines a global user type (Viewer, Editor, Administrator), roles (what someone can do), and access domains (where they can do it). Activity logs and security settings round it out.
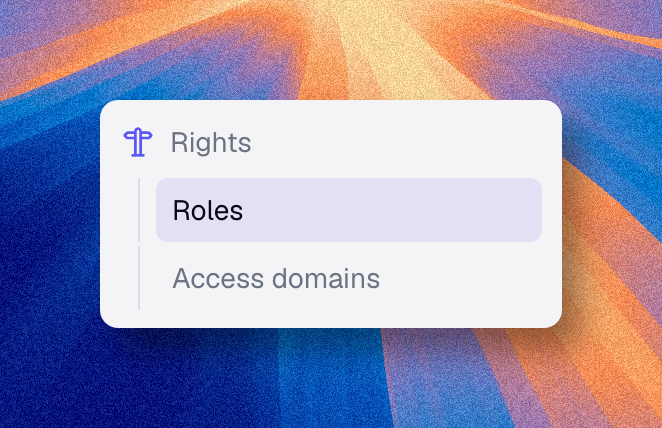
A role on its own is too broad; an access domain on its own does nothing. The real permission unit is the pair of the two. Start by drafting a few roles (Architect, Contributor, Reader), then scope them with access domains (Finance, HR, one project, one geography).
Try it now
- Open Organization settings → Users and review each member's user type. If you haven't invited anyone yet, do it now (step 1 of this guide).
- Open Organization settings → Rights and create a first role, for example Architect, with view and edit permissions on Applications and Processes.
- Create an Access domain (for example Finance) and grant the role on this perimeter only.
- Assign the role to a teammate from their user profile.
- Open Organization settings → Security and enable 2FA enforcement for the org.
- Hands-on companion guide: Set up your first role.
- Reference docs: Rights in 2 minutes, Users, Security.
You're set up
By now you should have, in your organization:
- a meta model with at least one custom property
- three applications, a team, and a dataflow created by hand
- (optionally) a larger inventory loaded from a CSV
- a saved view of critical applications
- a diagram of those critical apps with their team
- a chart of applications by hosting
- a nested map of capabilities
- a dashboard combining the above
- a process modeled in the Flow editor
- a role and an access domain assigned to a teammate
If something on this checklist is missing, jump back to the relevant section before moving on.
Going further
Four directions to explore from here:
- Automate with the API. Bulk-load, sync external systems, build integrations. See the API reference.
- Use Boldo as a source for AI use cases. Feed your structured knowledge base into agents or LLMs that need ground truth about your information system.
- Refine your meta model over time. A meta model is never finished. Keep iterating as you learn what your team actually needs.
- Talk to us. For advanced rights setups, AI integrations, or onboarding support, get in touch.