Bulk import from CSV or Excel
Your applications are already listed in an Excel file, and you do not want to copy them one by one. Import the file: each row becomes an asset, an item of your inventories. Boldo matches your columns with the information of your assets, and shows you what will change before anything is written.
This guide takes ten minutes. You will drop a file, check how Boldo reads it, then confirm the import.
Before you start
- You need to be an administrator of the organization. Otherwise, send your file to an administrator.
- Prepare a CSV or Excel (XLSX) file with one row per asset and a column for the name. No file yet? Step 1 gives you a template.
1. Open the Imports page
Open Organization settings, the building icon at the top right, then Imports.
No file yet? Next to Download a blank template, choose an asset type, for example Application, then CSV or XLSX. The template has one column for each piece of information of this type. The How to fill button tells you the expected format in each column.
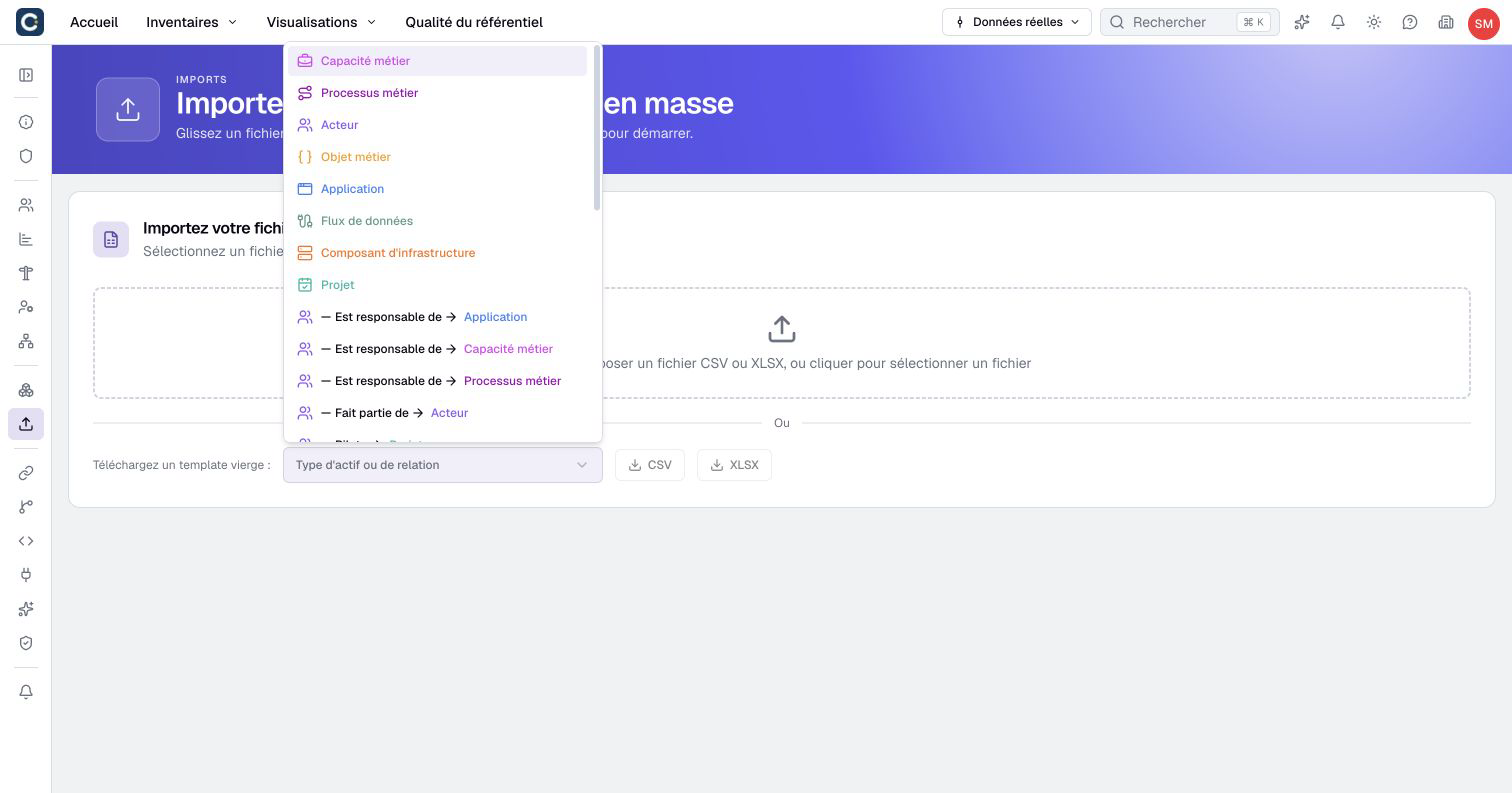
2. Drop your file
Drag your file into the drop zone, or click it to choose the file. Under Import, keep Assets. Under Asset Type, check the suggested type: Boldo guesses it from the file name.
3. Check how Boldo reads your columns
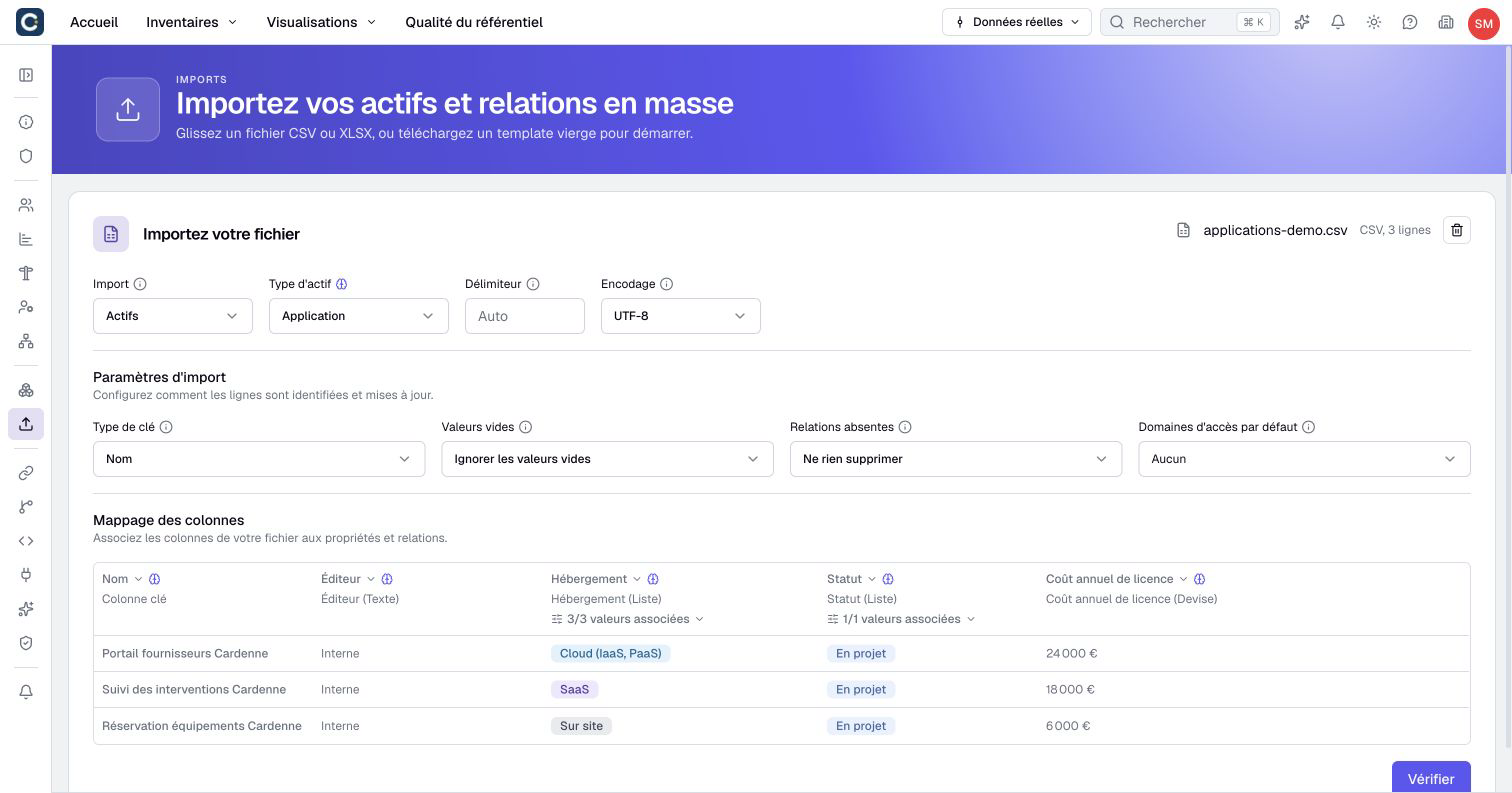
The Column mapping links each column of your file to a piece of information in Boldo. Columns with the same name are recognized on their own. For a column that is not recognized, choose the information in the list, or leave it Not mapped.
For lists of values, such as the status or the hosting, Boldo shows which value each value of the file matches. A value without a match shows in red. Fix it before you go on.
Open a date column’s options and check Date format: day first or month first. For missing-data markers such as n/a, choose No value where offered. They then follow the Empty values setting below.
4. Set the import settings
Under Import settings, four settings decide what the import does.
- Key type tells Boldo how to recognize an asset that already exists. With Name, a row whose name exists updates the asset, a new name creates an asset.
- Empty values decides whether an empty cell erases the existing value. By default, it is skipped.
- Missing relationships decides whether a link missing from the file is removed. By default, nothing is removed.
- Default access domains chooses who can see the new assets. Leave it empty if you do not use access domains.
5. Verify, then confirm
Click Verify. Boldo analyzes the file and shows a summary: the assets to create, those to update, those that stay unchanged and the skipped rows. Nothing is written yet.
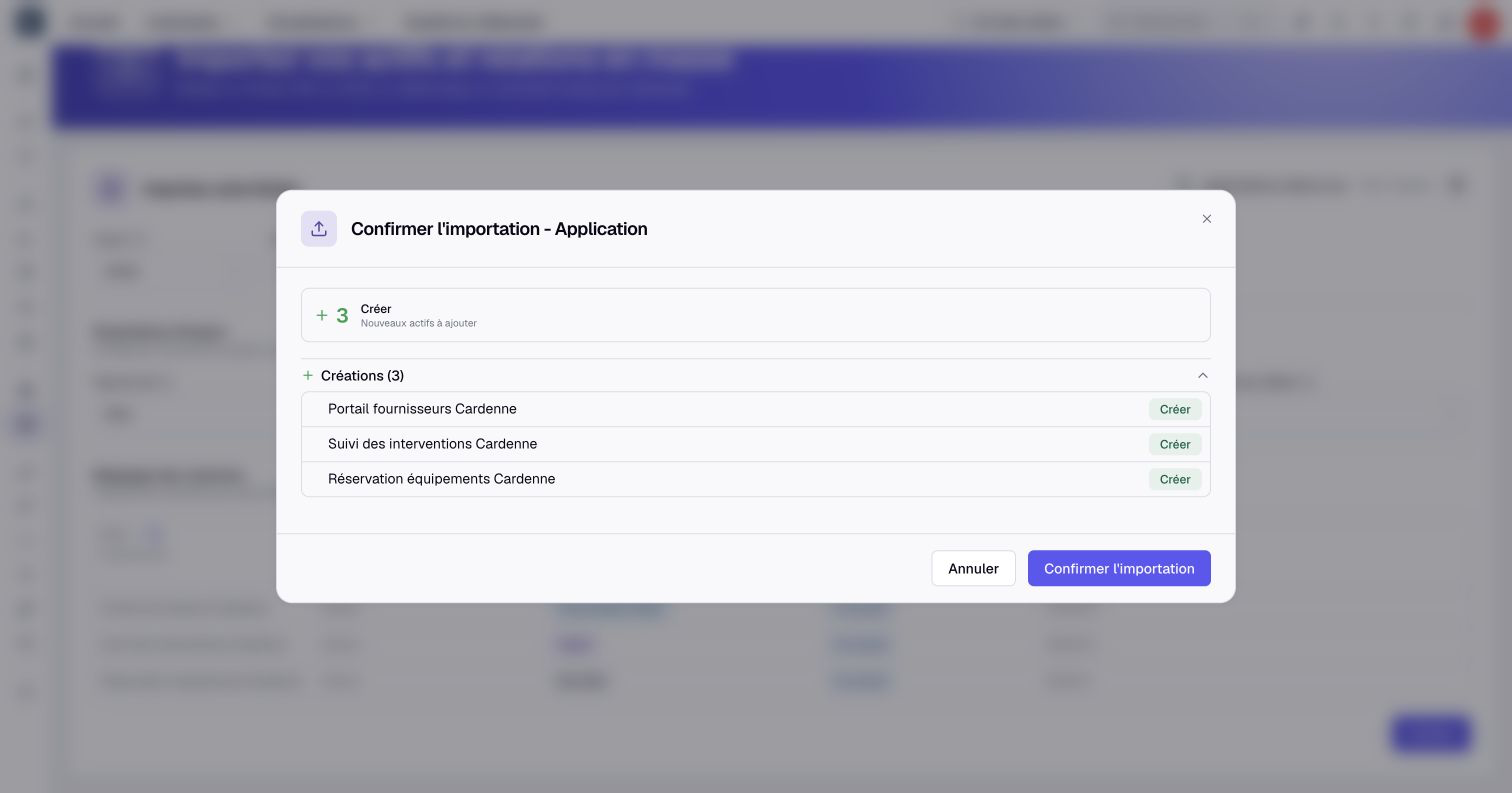
If the summary looks right, click Confirm import. Otherwise, close the window, adjust your settings and click Verify again. Once the import is done, the assets appear in their inventory, in your views and in your dashboards.
Key points
- Each row of the file becomes an asset, or updates an existing asset.
- Key type decides whether a row creates or updates an asset.
- Verify shows everything that will change before anything is written.
Go further
- Start your repository from Excel: the whole approach, from the first file to the owners who keep it up to date.
- Prepare your import file: the expected formats, column by column.
- Import relationships: link your assets together with a second file.
- Build your first repository: what comes next, once your assets are imported.