Quick start
This page gives you the shortest possible loop in Boldo: create an asset, connect it to another, then generate a first diagram from that data. If you want the full journey (account setup, meta model, import, views, charts, dashboards, governance), open the Getting started guide instead.
You need a Boldo account, Editor permissions on an organization, and a metamodel that already includes usable asset types. In most organizations, Applications and Processes work out of the box. If your metamodel uses different names, use the closest equivalent types.
Step 1: create your first asset
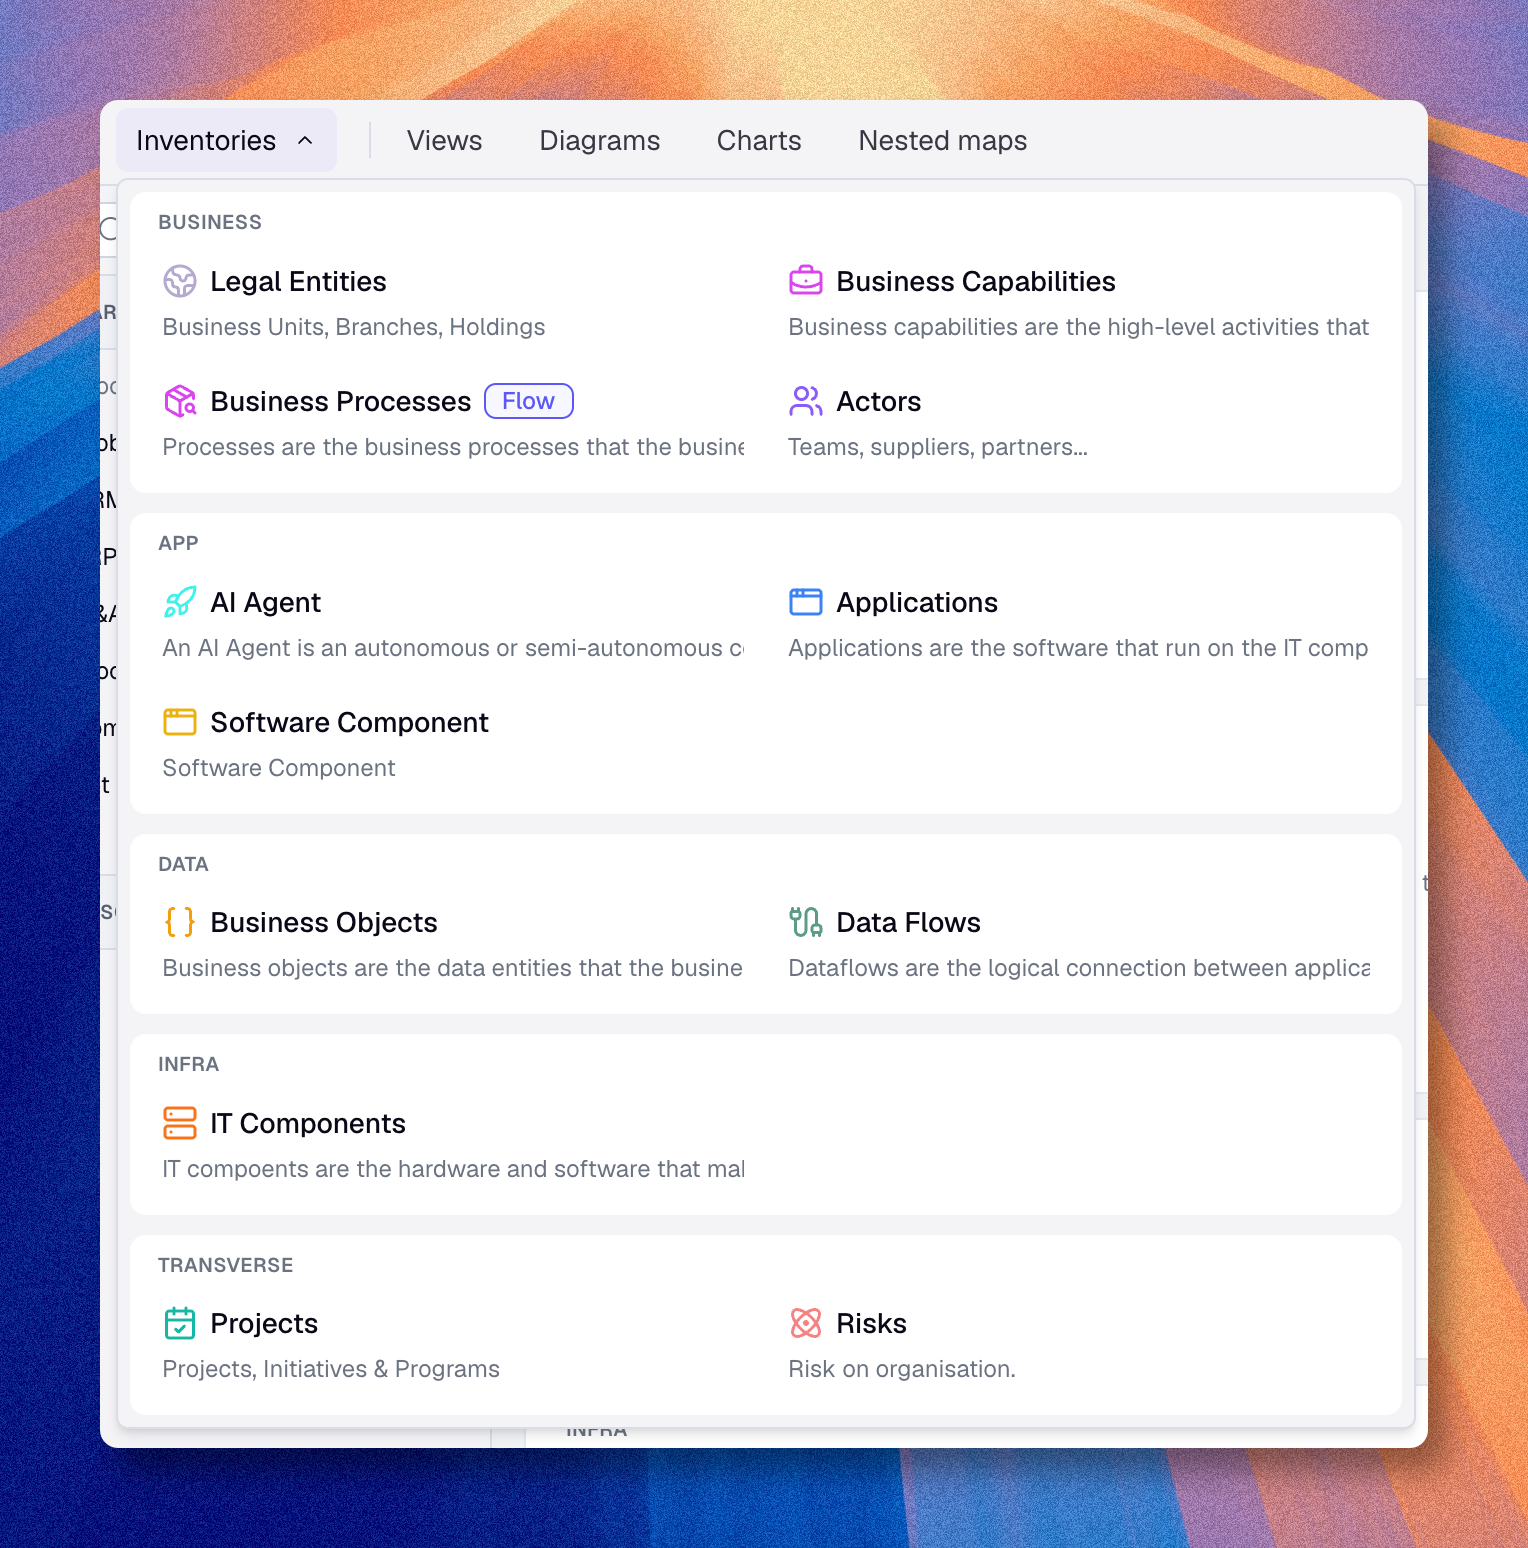
- Click Inventories in the top navigation bar.
- Select Applications from the list of asset types.
- Click Create asset (top right).
- Enter a name such as Customer Portal.
- Fill one or two properties if they're available.
- Click Validate.
You now have one asset in the inventory.
Step 2: add a relationship
An isolated asset is fine. Relationships are what make the knowledge base understandable.
- In the list, click Edit (pencil icon) on your new asset.
- Open the Relations tab.
- Pick a relationship type that exists in your meta model. In the default model, Enables is one example.
- Type Sales Process in the relationship field.
- Create the related asset on the fly, or pick it from the list if it already exists.
- Click Validate.
You've created a first connected structure: Customer Portal is linked to Sales Process through Enables.
Step 3: generate a first diagram
- Go back to the Applications inventory list.
- Make sure your new application is visible. Clear filters if needed.
- Click Actions → Convert view to diagram.
Boldo generates a diagram from the assets visible in the current view. You can then move nodes, add text or shapes, and share the saved diagram with your team.
Check the result
Before moving on, confirm:
- the two assets exist in the inventory;
- the relationship is visible from one asset to the other;
- the generated diagram contains the assets you expected.
In Boldo, a diagram is only as good as the data behind it.
Next steps
- Getting started — the full end-to-end journey, from account setup to dashboards and governance, with hands-on steps at each stage.
- Key concepts — the vocabulary behind this flow.
- Manage assets — go further with the inventory.