Process flows
A process flow models a step-by-step workflow, lifecycle, or pipeline inside one asset. It is not a standalone catalog visualization: the flow belongs to the asset that carries it, and it can reference other inventory assets inside its steps.
Use a process flow when the main question is "what happens next?". Use a diagram instead when you need a free visual map of relationships across several assets.
Setup path
Process flows have two layers: administrators enable the capability on an asset type, then users model the flow inside assets of that type.
| Stage | Where | Result |
|---|---|---|
| Enable Flow | Organization -> Metamodel -> Assets | Assets of that type can have a flow |
| Configure references | Asset type Flow settings | Only selected asset types can be referenced in steps |
| Configure rights | Organization -> Roles or Domains | Users receive read or edit access to the flow |
| Model the flow | Asset 360 page -> Flow editor | The process is documented inside the asset |
Before the Flow editor tab appears, all of these conditions must be true:
- your plan includes process flows
- the asset type has Flow enabled
- the asset exists
- your role-domain rights let you view the asset
- your role-domain rights grant sufficient Flow access
If the tab is missing, check those conditions in that order. For the configuration details, read Asset types.
Access rights
Flow access is managed in the asset rights table under a dedicated Flow access column for each flow-enabled asset type.
| Level | What it allows |
|---|---|
| No access | You do not see the Flow editor tab |
| Read flow | You can read the flow and use exploration mode |
| Edit flow | You can modify the flow when asset rights and user type also allow editing |
Flow access is capped by asset access. Edit flow requires edit_asset on the asset type and a user type of at least Editor. A user with only view_asset can have at most Read flow, even if the role table grants a higher flow level.
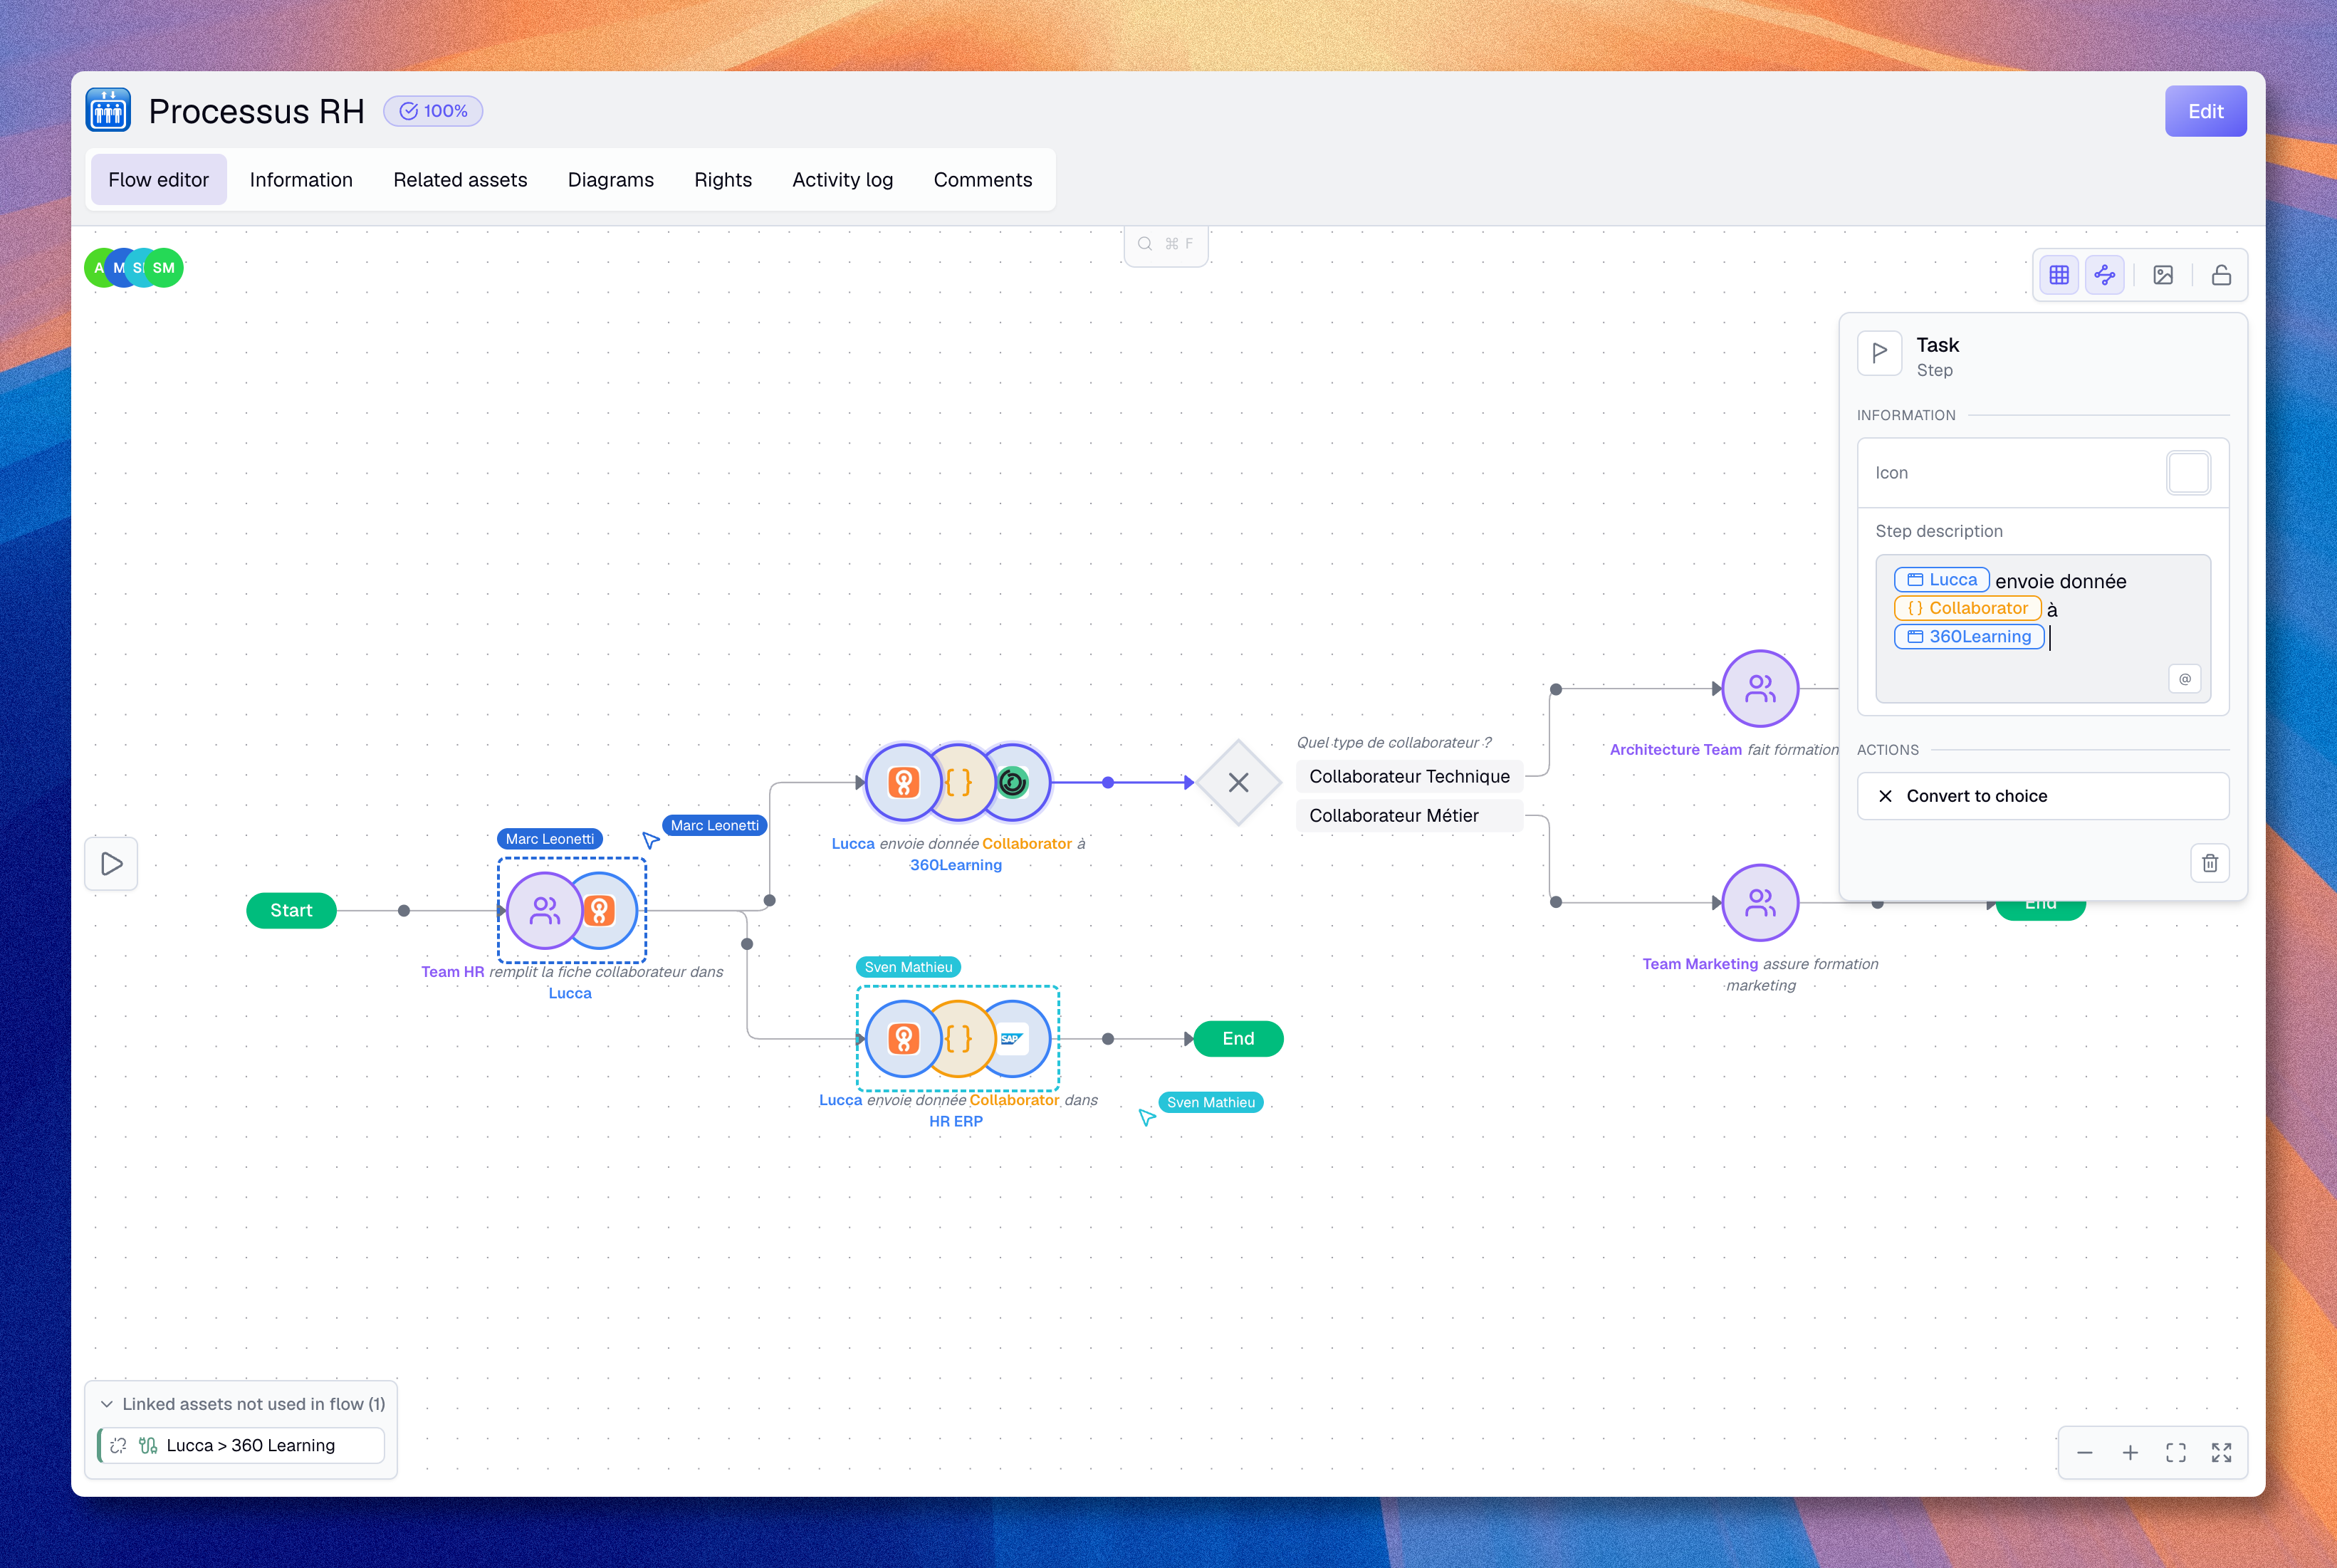
Build a flow
Every flow starts with an auto-created Start step. From there, you add steps, connect them, and describe what happens at each point.
- Open the asset and select the Flow editor tab
- Hover a non-End step and use the + action to add or insert a Task
- Convert the new step to Choice or End when needed
- Select each step and add its name, icon, and content
- Label outgoing paths from Choice steps when several outcomes are possible
- Repeat until every path reaches one or more End steps
You can reorganize steps by dragging them onto edges or after other nodes. The editor detects loops automatically and marks back-edges with a purple dashed line and a loop badge.
Connections and branches
Connections define the reading order of the flow. A simple sequence connects one step to the next. A branch starts from a Choice step and sends the reader to different next steps depending on the selected condition.
To connect to an existing step, start a connection from a non-End source step, then click the target step. The target can already have another incoming connection.
To make two paths converge, connect each source step to the same target step. For example, two different Task steps can both connect to one shared End step, or two branches from a Choice can meet again on the same later Task. You do not need to duplicate the target step when the process really joins back together.
Common patterns:
| Pattern | How to model it |
|---|---|
| Linear sequence | Use + to insert a step after the current one |
| Decision branch | Use the branch action on a step with an outgoing path, then label each outgoing path |
| Convergence | Connect several source steps to the same target step |
| Insert on an edge | Drop a step onto an existing edge |
| Loop | Connect a later step back to an earlier step |
Step types
| Step type | Shape | Use it for |
|---|---|---|
| Start | Start node | The automatic entry point of the flow |
| Task | Circle | An operation, stage, or activity |
| Choice | Diamond | A decision point with several possible paths |
| End | End node | The point where one branch terminates |
A complete flow has a clear start, named steps, labeled choices when branches exist, and at least one end point.
Step content
Select a step to open the inspection panel. This side panel lets you edit the step name, icon, type, and rich-text content.
To reference an inventory asset, type its name in the content editor and select it from the autocomplete menu. Selected assets appear as colored tags inside the text. Boldo tracks these references with the relationship style configured on the asset type, so the assets involved in the process stay connected to the rest of the knowledge base.
The autocomplete only proposes asset types allowed in the asset type's Flow configuration. Each step can also carry a custom icon selected from the icon picker.
The linked assets not used panel lists assets linked to the process through relationships but not referenced in any step. Use it to find assets to place in the flow or to remove links that are no longer relevant.
Explore and present
Exploration mode lets you walk through the flow interactively instead of reading it like a static image.
- Activate exploration mode from the canvas toolbar
- The flow highlights the Start step
- At each Choice, select the path that matches your scenario
- The timeline records your choices as you progress
- Visited steps stay highlighted while non-visited nodes are dimmed
Use this mode for onboarding, audits, and reviews with stakeholders. The canvas toolbar also includes zoom, fit, fullscreen, grid, edge animation, lock, PNG export, and search across step names and content.
Collaboration
Multiple users can edit a flow at the same time. The editor shows live cursors, selections, and a presence panel listing connected users. You can follow another user to see their viewport and edits in real time.
Real-time collaboration makes flows useful for process-mapping workshops, expert review sessions, and shared documentation work.